RG353 GammaOS Install Guide
If you have an RG353, GammaOS is an Android custom firmware option available for the RG353 dual boot devices such as the RG353V, M, P, or Arc D.
Be sure to check out my RG353 Starter Guide for more tips and tricks on getting the most out of you RG353 device
GammaOS is based on the LineageOS Android firmware and brings some performance improvements and quality-of-life improvements over the stock Android operating system included in the device.
The process of updating to the RG353 GammaOS firmware is quite straightforward and the overall process only takes about 30 minutes.
If you are looking for the RG405M Gamma OS Install Guide, check it out by following the link here
Why should I use RG353 GammaOS?
Unlike Linux CFW, Android is mostly the same basic experience regardless of which version of Android we are using.
There are some major advantages to using GammaOS, however
- Slight Performance Improvements
- Bundled with Google Play Store (Full install only)
- Active Development which should bring security and performance fixes over time
How to Install GammaOS on RG353
Warning: The Android operating system resides on the internal memory in the device and so, unlike switching Linux custom firmware, updating your Android CFW will replace everything that you’ve done previously on your Android setup.
GammaOS Full or Lite?
The first thing we need to decide when choosing the RG353 GammaOS software is which version we want to install.
GammaOS comes in two different versions: Full or Lite
The Lite version of GammaOS does not come with Google Play Services installed. Google Play Services is always running in the background using resources so it will have a slight performance hit. If you want the leanest build, we want to choose the Lite Version over the Full Installation.
The Google Play store is not the only way to install apps on the RG353 and if you want to keep your system lean to squeeze every last bit of performance out of it, check out the Aurora Store app as an alternative.
RG353 GammaOS download link
Once we have decided on Lite or Full, download the corresponding installation image from the Gamma Squeeze Github page
Download Link for RG353 GammaOS: https://github.com/TheGammaSqueeze/GammaOS-RK3566/releases/
RG353 GammaOS Install Disk
Once we have the corresponding install package, we are going to extract the contents into a temporary folder.
Note that you cannot simply burn the image file to an SD card with BalenaEtcher or Rufus or any other image burning software. You must use the included tool to create rockchip compatible firmware.
The extracted contents will contain an *.img file and a folder called SDDiskTool
Insert a blank SD card of at least 8GB into your computer.
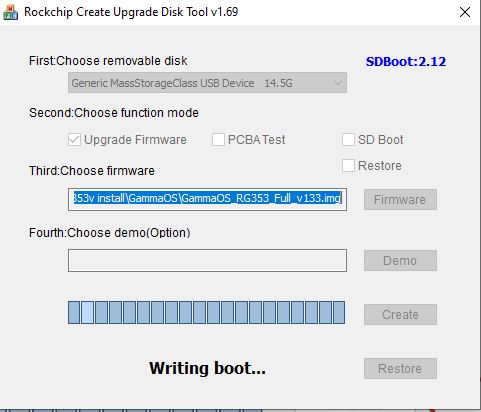
Open the SDDiskTool folder and run the SD_Firmware_Tool.exe file
On Step 1: Make sure that your blank SD card has been selected
Step 2: Upgrade Firmware Option should be selected
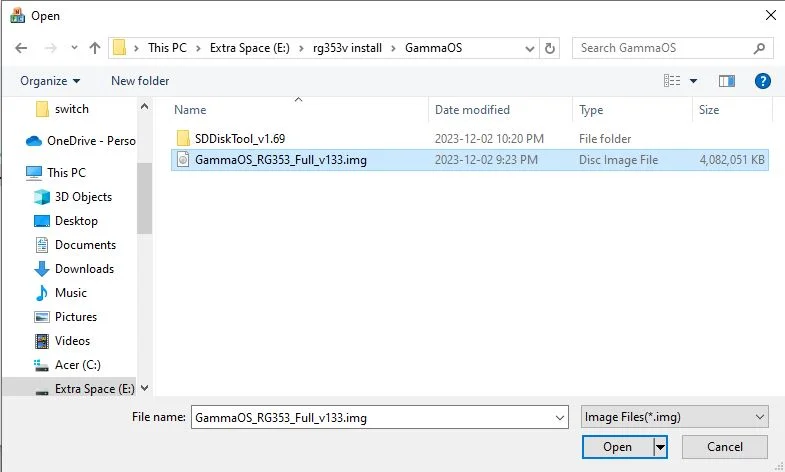
Step 3: Press the Firmware button to browse to the extracted *.img file in the temporary directory
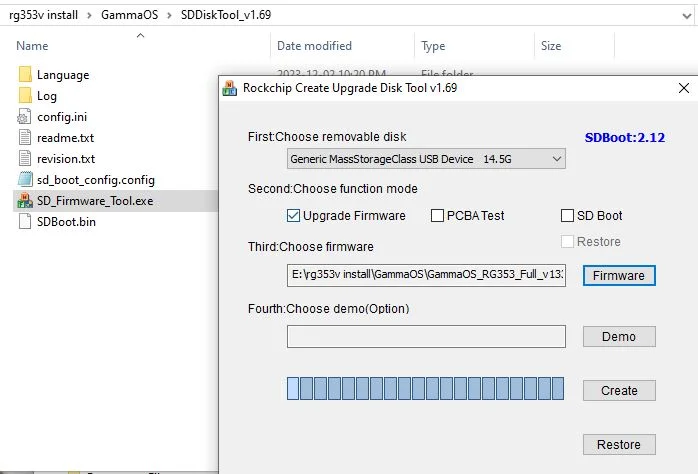
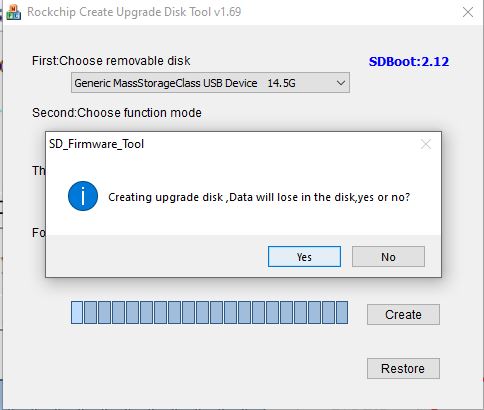
Once the Firmware file has been selected, press the Create button and let the program create the installation image for you.
When prompted, to create the upgrade disk and lose everything on the disk, select Yes
During the creation process, Windows automatically opened the folders and partitions that were being created and even prompted me to “fix” the new drive. If this happens to you, simply close any new Explorer windows and make sure not to “fix” any of the new drives.
When the writing process is complete, safety eject the SD card.
RG353 GammaOS First Boot
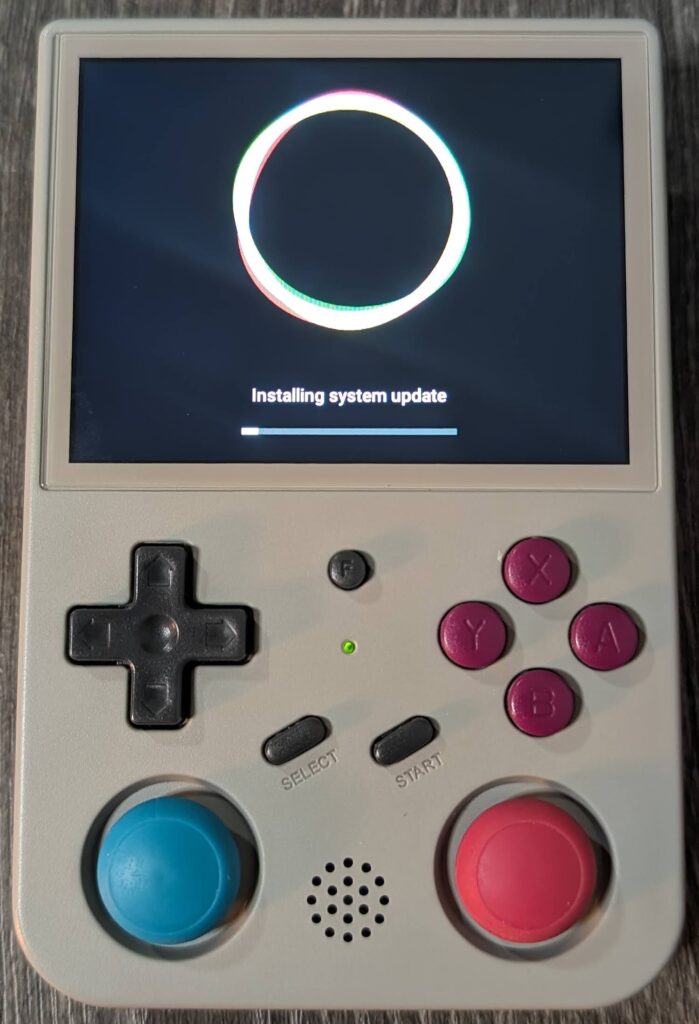
Now that we have the install disk, insert the SD card into TF Slot 1 on your device and turn it on.
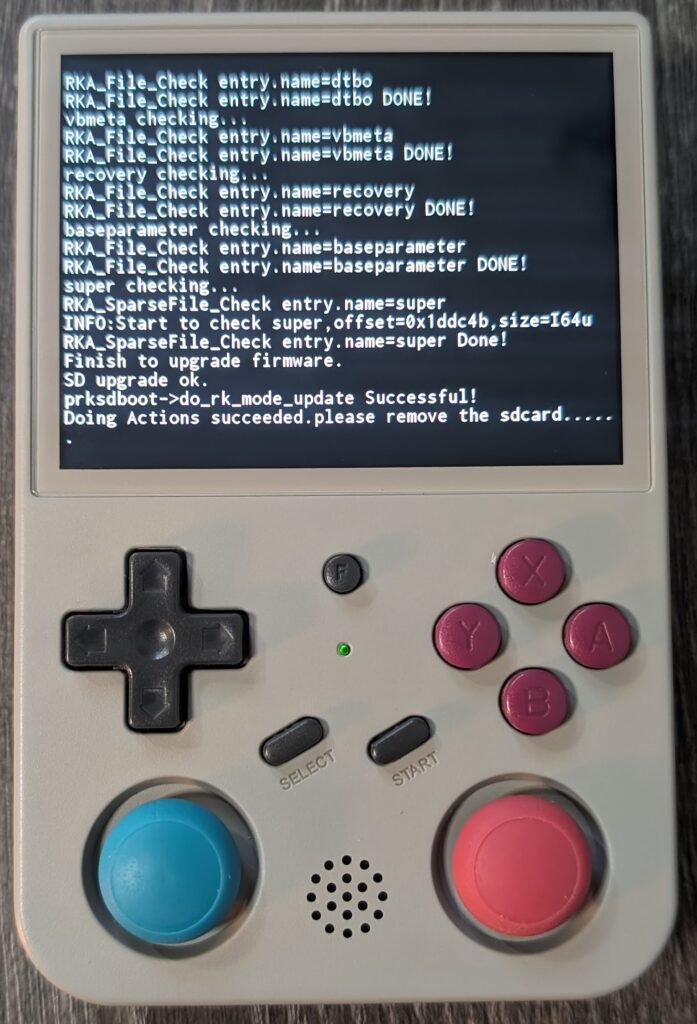
The installation process should start automatically and will go through a series of screens with loading bars. The device will even restart itself a few times. Eventually, the install process will complete with a wall of text where one of the lines will tell you the process is complete and to remove the SD card.
At one point, my device screen just turned off. If this happens to you, just do a quick press of the power button to turn the screen back on.
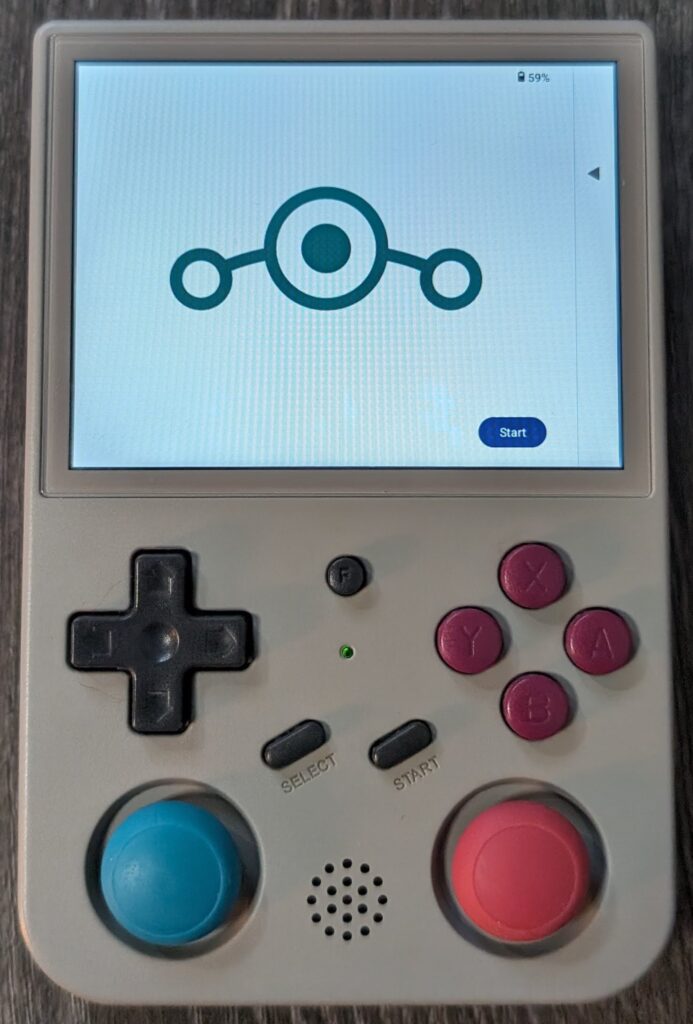
When you remove the SD card, the system will reboot and start the GammaOS initial setup.
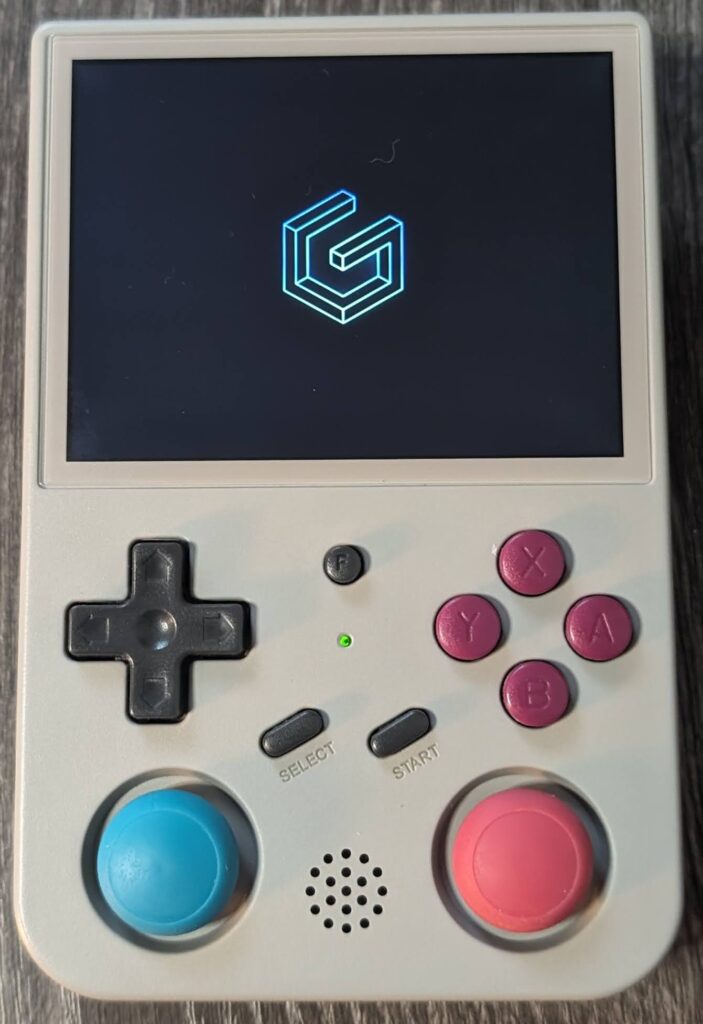
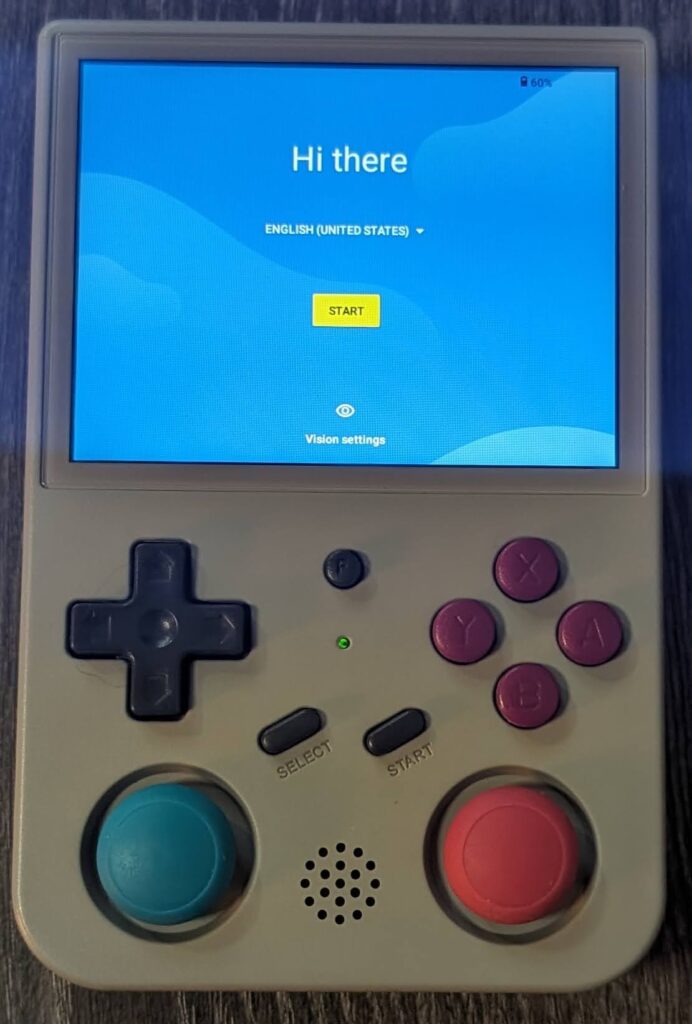
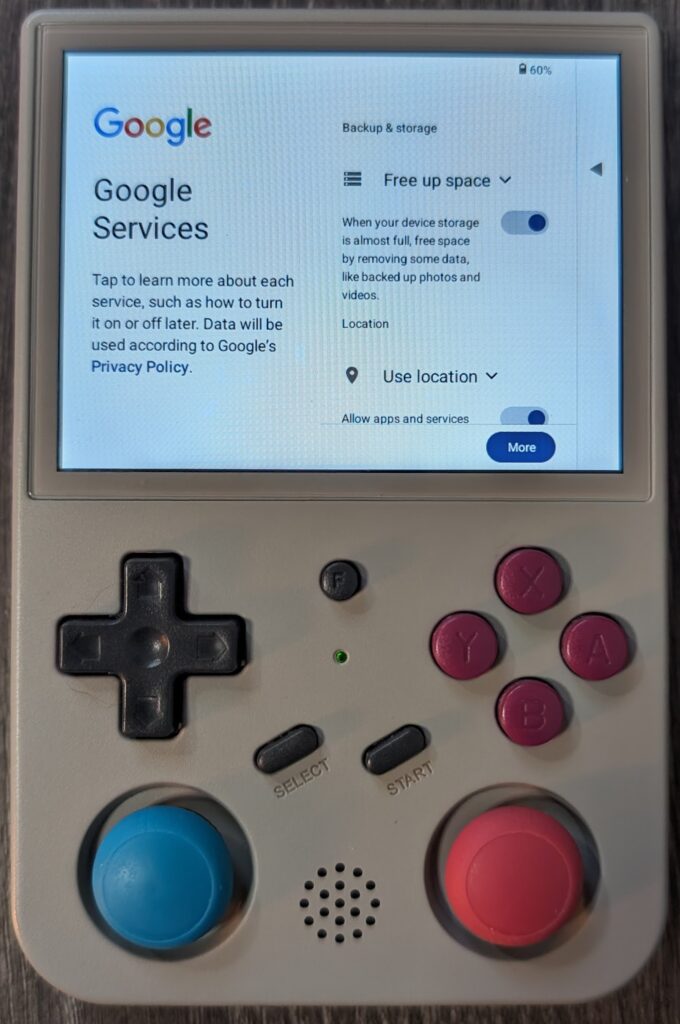
RG353 GammaOS Initial Setup
When GammaOS loads for the first time, we will be walked through a standard Android setup. If you have ever setup a brand new Android phone, the process is pretty much the same.
At this time we will select our Wifi, Timezone, Security settings, etc.
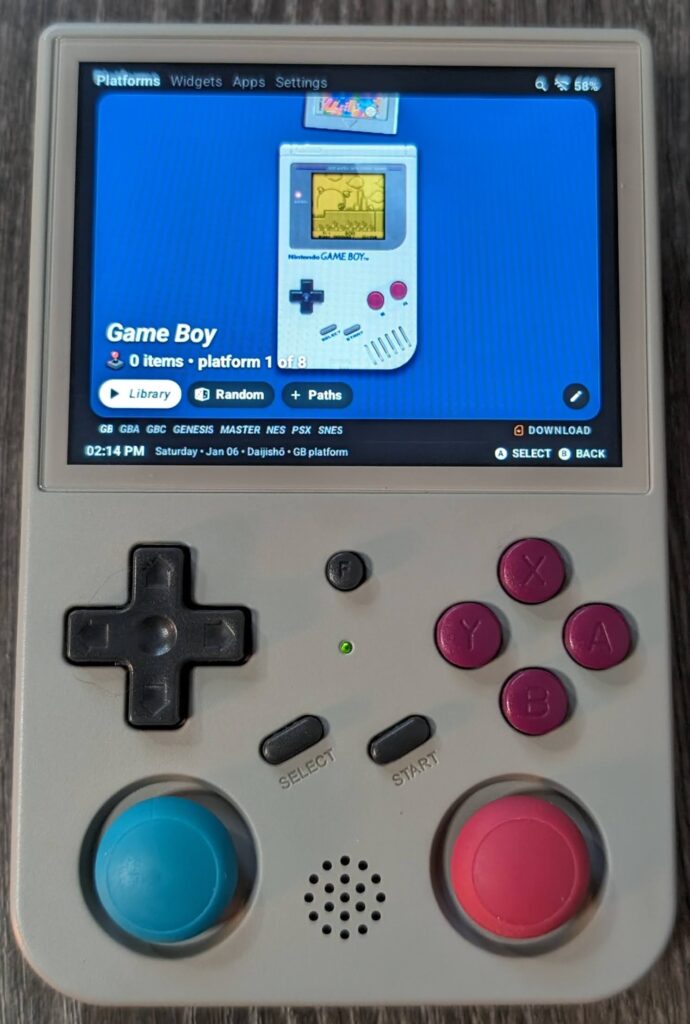
When the initial setup is complete, the device will immediately launch into the Daijisho frontend launcher and you are all set to start installing your favourite Android emulators.
For more info on setting up and using Daijisho, be sure to check out my Daijisho setup guide for tips and tricks on getting started with this fantastic frontend launcher
More Reading..
-
RG353 Ports and PortMaster
While the RG353 is primarily designed as an emulation device targeted at retro home and handheld consoles, it is also capable of playing a number…
-
RG353 Dreamcast Best Settings Guide
When it comes to Dreamcast, the RG353 is capable of playing a good portion of the library but to get the best experience you’ll probably…
-
RG353V Shoulder Button Replacement Guide
In this RG353V Shoulder Button replacement guide, I will show you how to replace the back shoulder L1/R1/L2/R2 buttons in this device with the Better…
-
RG353V Hall Sensor Joystick Replacement Guide
In this RG353V Joystick replacement guide, I will show you how to replace the joysticks in this device. The joysticks in the RG353V and RG353VS…
-
RG353 CFW Comparison Guide
The RG353 has a number of custom firmware options for Linux that give the device a new look and feel over the stock OS. Each…
-
RG353 PSP Performance Compatibility List
In this RG353 PSP Performance list I will show you my ratings of over 85 PSP games that I have personally tested on my RG353V…