How to install GarlicOS on RG35XX
In this guide, I will show you the steps on how to install GarlicOS on your RG35xx device. The process is very easy and with the steps in this walkthrough, we will be up and running with our new custom firmware in no time.
If you are at all familiar with the RG35xx then you know that they are fantastic devices that can emulate up to PS1 games without issues. However, Anbernic has a habit of releasing devices with less than good operating systems out of the box.
Luckily, the development community has stepped up to the plate and released a number of great operating system alternatives and one of the best options is the RG35xx GarlicOS custom firmware.
Introduction
GarlicOS is based on the popular OnionOS for the Miyoo Mini. It brings a lot of great features to the RG35xx which improves the device immensely.
GarlicOS features a simple, intuitive interface, auto-save state and auto-resume games, a favourites list, as well as a number of emulators already pre-configured for best settings on the RG35xx.
GarlicOS is just one of a few different custom firmware options available for the RG35xx. Take a look at some of the other custom firmware options available in my RG35xx Custom Firmware Guide
Installing a custom firmware on the RG35xx is not a very complicated process so let’s take a look at how to get the RG35xx GarlicOS custom firmware up and running on your device.
Tools you will need
- 7zip
- Rufus
- MiniTool Partition Wizard (free edition)
- GUIFormat (optional for two card setup with SD larger than 32GB)
- Good Quality SD Card
If you are attempting to install GarlicOS on a brand new device, I suggest that you get at least one (or two if you plan on a dual card setup) good, high quality SD card to replace the one that came with the RG35xx. The SD cards that come with these devices are usually cheap no-name cards that are prone to failure. Here are a few of my recommendations for replacements:
How to Install GarlicOS
Download RG35xx GarlicOS
The first thing that we will need to do is download the RG35xx GarlicOS firmware from BlackSeraph. This developer has done a ton of great work for the retro handheld gaming community and if you have a few dollars to spare, consider contributing to the Patreon or Ko-Fi campaigns found on the link above.
GarlicOS is a free download made available by BlackSeraph and you can find it by following the link below to the latest Patreon post.
GarlicOS download link: https://www.patreon.com/posts/76561333
On this post you will find the change logs for all of the past versions of GarlicOS and if you scroll to the bottom of the post just above the comments section you will see a few files available for download.
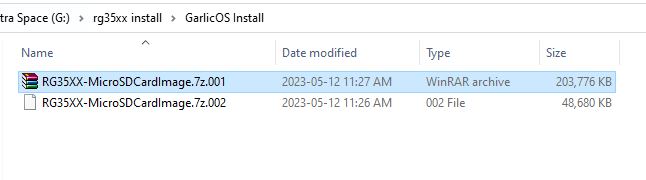
The files that we are looking for will be called RG35XX-MicroSDCardImage.7z.001 and .002
Ensure these two files are in the same folder then extract them using 7zip by extracting the file with the .001 extension.
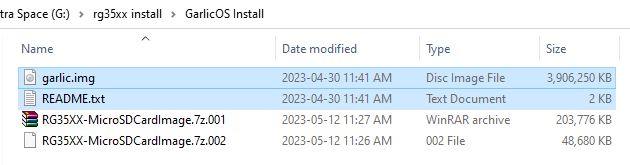
Once the extraction is completed, you should have two files: garlicos.img and readme.txt
Flash the RG35xx GarlicOS image
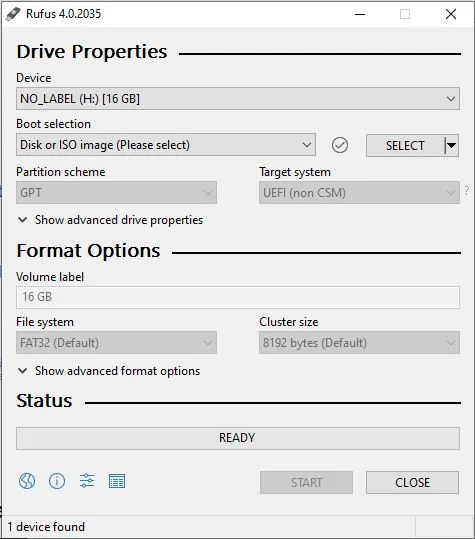
Now that we have the .img file, we will use the Rufus software to flash the image to our new SD Card.
Insert your new SD card into your computer through an integrated SD card reader or USB SD card reader.
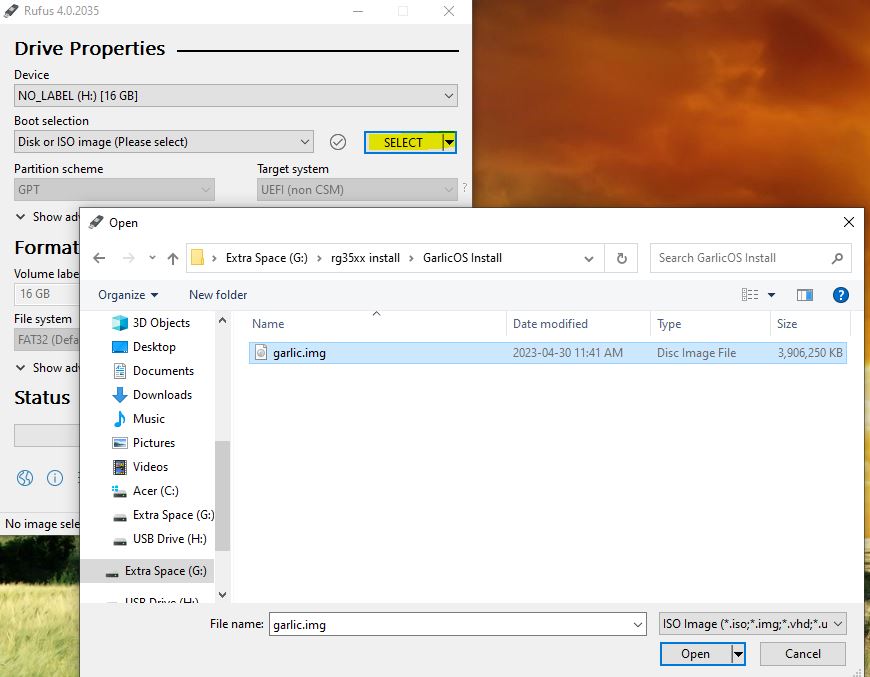
Open the Rufus software. Ensure that the Device field has our SD card selected.
Next to the Boot Selection dropdown is a Select button which we will use to select the garlicos.img file that we extracted earlier.
Once selected, you can press the Start button to begin the flashing process.
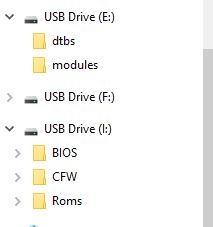
When completed, the SD card should have three partitions recognized by Windows with one of them being unreadable. When prompted by Windows, ensure that you tell it that you DO NOT WANT TO FORMAT THIS DRIVE.
The first drive is the Boot partition which we won’t be touching here but used occasionally when installing themes or making other mods to the operating system.
If you would like to learn more about installing custom themes on GarlicOS, check out my RG35xx Themes Installation Guide
Expand the Roms partition
The partition we are interested in is the last one which contains the BIOS, CFW, and Roms folders.
Before we expand the partition, I suggest that you make a backup of these three folders onto your local hard drive by copying and pasting these three folders into a temporary directory on your PC. Keep these files just in case something goes wrong with the partition expansion.
By default, the Roms partition will only use up the minimum amount of space required to install the firmware so we need to expand this partition to use up all of the available free space on the SD card so that we can fit as many games as we can onto the device.
For this step, we will open the MiniTool partition wizard software. You should see a list of all of your drives including the SD card that we just created with the GarlicOS image.
Under the SD Card, you should see a number of different partitions including one that is FAT32 formatted.
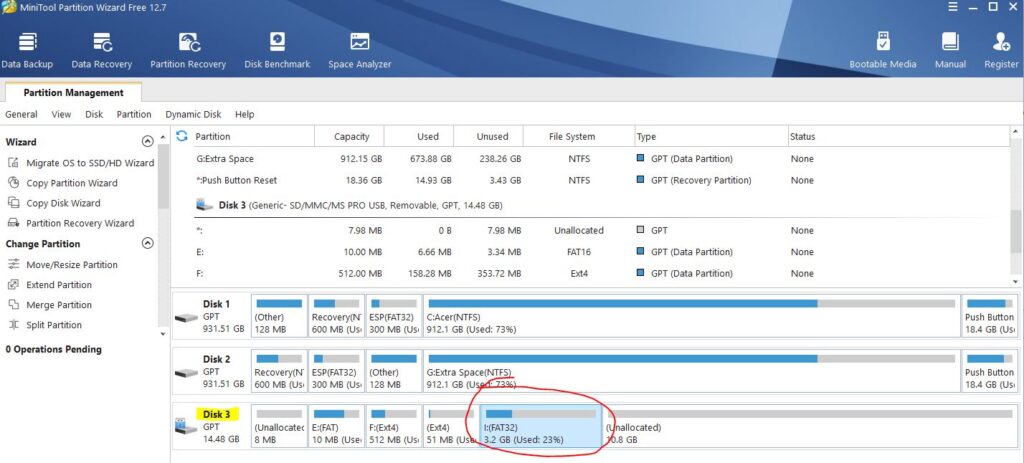
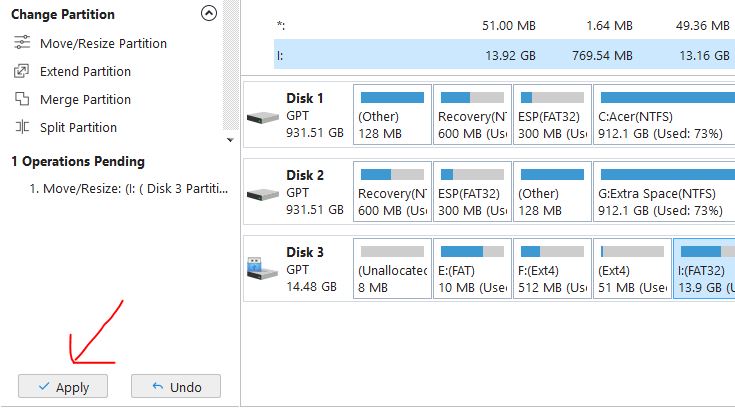
Right click on this partition and select the Move/Resize option then drag the bar all the way to the right so that it takes up all of the unallocated space.
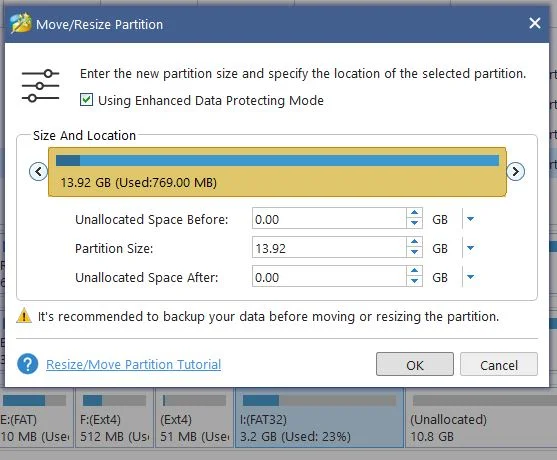
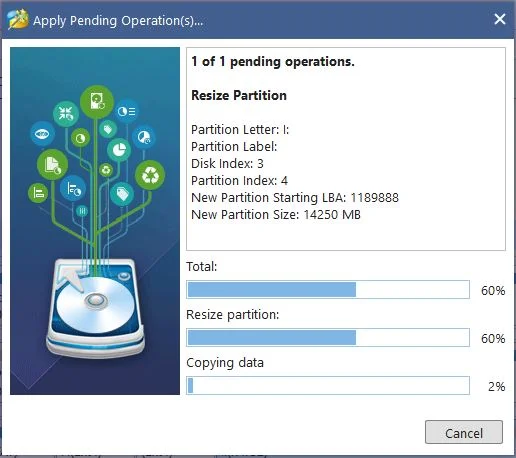
After you click the OK button, just be sure to Apply the change in the Operations Pending section, then you will see a progress bar appear of the changes being applied.
Once the operation is complete, you are ready to begin loading your ROMS and BIOS files onto the Roms partition that we just expanded.
For more information on how to add ROMS and BIOS files to the RG35xx, check out my RG35xx Starter Guide
If the operation failed for some reason, you’ll need to Delete the partition and Create a new one as a FAT32 partition then copy over the BIOS, CFW, and ROMS folder that we backed up earlier.
(Optional) Dual SD Card setup
There are some advantages to using two SD cards in the RG35xx instead of just one. With a two card setup, the firmware (operating system) will go on the first SD card and the second SD card can contain all of your ROMS and BIOS files.
With this setup, you can swap the custom firmware card in TF1 with an SD card formatted with a different firmware like Koriki to quickly switch operating systems without having to move all of your ROMS again.
This setup also saves you from having to re-do your entire setup if something goes wrong with the SD card like a card failure.
In a dual card setup, you’ll only need a small SD card (8GB or 16GB) for your custom firmware and a larger SD card for all of your games as the second.
To use the dual card setup, simply format your second SD card as FAT32. For SD cards 32GB or larger, you’ll need to use a tool like GUIFormat to format the card as Windows cannot do this as a default option.
Once formatted, move your BIOS and ROMS folder to the second SD card and plug it into TF2/EXT slot on your RG35xx and you are good to go.
Using GarlicOS
To turn on the system, simply hold the power key for 5 seconds until the boot logo appears.
To turn off the system, hold the power key. When you boot up the system again, it will resume where you left off whether it be in the middle of a game or at the menu.
GarlicOS Quick Keys
In Menu
- Start = Load game from beginning (not from save state)
- A = Load game from last save state
- Select = Change Overclocking option
- Menu = Go to Recent menu
- Menu + Volume = Adjust Brightness
In Game
- Menu (single click) = Exit Game to GarlicOS menu
- Menu (double click) = Exit Game to Recent menu
- Hold Menu Key will show you all of the Menu + hotkey function combinations
- Menu + X = Retroarch Menu
- Menu + Select = FPS Counter
- Menu + R1 = Fast Forward
- Menu + L1 = Slow motion
- Menu + R2 = Save State
- Menu + L2 = Load State
Overclocking/Underclocking
GarlicOS has a quick overclocking feature available directly from the main menu.
For many of the older systems, overclocking will not be necessary but for some of the new systems like PS1 or even some harder to emulate SNES games, you may find better performance by overclocking the device.
Keep in mind that overclocking the RG35xx will run the clock at a higher speed and therefore require more power which will drain your battery faster. Alternatively, underclocking if you primarily use easier to emulate systems can increase the battery life.
To overclock the RG35xx in GarlicOS, simply press the select button on the main menu. You’ll notice that either a plus (+) or minus (-) symbol will appear near the battery indicator in the top right corner to indicate overclock or underclock. As you press the select button, the symbols will toggle through overclock, standard and underclock settings.
Additional GarlicOS Features
GarlicOS Themes
GarlicOS offers lots of great community created themes. To learn more about creating and installing themes in the RG35xx GarlicOS firmware, check out my RG35xx Themes Installation Guide
GarlicOS Ports
In addition to emulating home and handheld console systems, there are also a number of fantastic fanmade games and PC ports available for GarlicOS. Read more about installing ports in GarlicOS in my RG35xx Ports Installation Guide
Finally, don’t forget to read more about getting started with the RG35xx in my RG35xx Starter Guide
More Reading..
-
How to Download GarlicOS Box Art
GarlicOS is a fantastic custom firmware that greatly improves the experience on the RG35xx. It is lightweight and intuitive to use as well as pretty…
-
RG35xx Replacement Buttons Install Guide
In this RG35xx replacement buttons install guide, I will be guiding you through the process of replacing the front face buttons on the RG35xx. RG35xx…
-
RG35xx Batocera Lite and Koriki Guide
June 2023 – The developer porting Batocera to the RG35xx has stopped development and started working on a fork of Batocera called Koriki which is…
-
RG35xx Starter Guide
The RG35xx is Anbernic’s answer to the widely successful Miyoo Mini. The RG35xx covers the cheap, ultra portable segment of the retro handheld gaming market…
-
RG35xx Themes Installation Guide
It’s not hard to see why GarlicOS is the most popular custom firmware available for the RG35xx. In addition to being fast and vastly improves…
-
RG35xx Ports Installation Guide
While the RG35xx is primarily a handheld device designed to play games from home and handheld consoles, did you know that it can also play…