Installing Custom Firmware (CFW) on the RG353
Installing custom firmware (CFW) on your RG353 device is not a complicated process. A custom firmware is basically just an operating system and like any operating system you could install on your home computer like Windows 11, Ubuntu, Arch Linux, etc, they each offer their own unique interface, tools, and customization options.
For a list of the Custom Firmware options available on the RG353 with download links, check out my RG353 CFW Comparison Guide
The first thing you need to know is that for each of the RG353 devices, you have both an Android OS and a Linux OS (with the exception of the RG353VS which is Linux only).
The Linux OS resides on the SD card which is inserted into the TF1 card slot on the side of your device. This means that you can create different SD cards each with a different version of the Linux firmware of your choice and boot them up at any time you feel like simply by replacing the card in TF1.
The Android OS resides on the internal memory of the device. This means that you only get one version of Android on your device at a time and any time you want to change the firmware, you need to wipe the entire Android partition and start over again from scratch.
If you are looking for a general starter guide on setting up your RG353, check out my RG353 Starter Guide here
With that in mind, let’s get started
Things you’ll need
- SD card – a small 8GB or 16GB card is fine if you plan to use a second SD card for your games (recommended)
- Image burning software
- A computer
- An image file of your chosen Custom Firmware
Image burning software
Choose one of the following software from below to download and install on your PC
Custom Firmware Image File
Choose one of the following Custom Firmware images to download to your PC
Linux
Android
Installing your Custom Firmware
The process of burning a CFW for either Android or Linux is exactly the same. The only difference is that the Linux setup process will create everything on the SD card that you’ve used and that SD card will always need to be inserted into TF1 to use that OS. The Android CFW will replace everything on the RG353 internal memory and so once the process is complete, you will take the SD card out of the TF1 slot and you can re-use the SD card for something else as it is no longer needed.
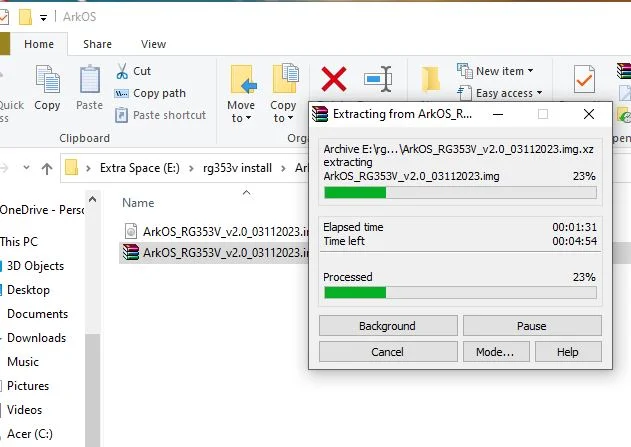
Once you’ve downloaded your custom firmware image of choice, make sure that it is in a *.img format. If it is zipped then be sure to extract the file from the zip first.
Insert your blank SD card into your SD card reader on your PC. If it is a brand new card, you don’t need to format it or anything as the image burning process will take care of that for you.
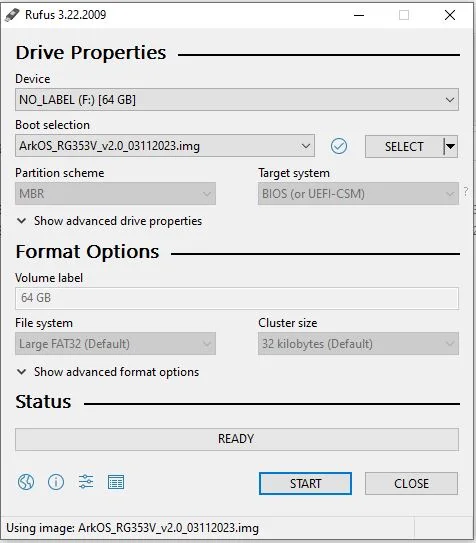
Next, open up your image burning software of choice. I’ll use Rufus in my example
In your software, under “Device” you will select the blank SD card that you just inserted

Now click “Select” and browse for the *.img file of the custom firmware that you downloaded

Click “Start” and wait for the process to finish
After the process has completed, eject the SD card from your computer and insert it into the TF1 slot on your RG353 device.
Turn on the device and let it go through the initial setup process. This can take up to 10 minutes so just sit back and relax while it does it’s thing.
If you are using a Linux CFW, keep the SD card inserted into the TF1 slot at all times. This is how the RG353 finds all of the OS files to boot into that OS.
If you are using the Android CFW, once the install process is complete, you’ll be asked to remove the SD card and reboot the system. From here on out, you no longer need the SD card with the image on it and booting into Android means that you shouldn’t have an SD card inserted into the TF1 slot.
More Reading..
-
RG353 GammaOS Install Guide
If you have an RG353, GammaOS is an Android custom firmware option available for the RG353 dual boot devices such as the RG353V, M, P,…
-
RG353 Ports and PortMaster
While the RG353 is primarily designed as an emulation device targeted at retro home and handheld consoles, it is also capable of playing a number…
-
RG353 Dreamcast Best Settings Guide
When it comes to Dreamcast, the RG353 is capable of playing a good portion of the library but to get the best experience you’ll probably…
-
RG353V Shoulder Button Replacement Guide
In this RG353V Shoulder Button replacement guide, I will show you how to replace the back shoulder L1/R1/L2/R2 buttons in this device with the Better…
-
RG353V Hall Sensor Joystick Replacement Guide
In this RG353V Joystick replacement guide, I will show you how to replace the joysticks in this device. The joysticks in the RG353V and RG353VS…
-
RG353 CFW Comparison Guide
The RG353 has a number of custom firmware options for Linux that give the device a new look and feel over the stock OS. Each…