RG35XX H Starter Guide
In my RG35XX H Starter Guide, I will be showing you how to set up the RG35XX H and familiarize you with the stock OS as well as give you some tips on how to get the most out of this new device.
The RG35XX H is a horizontal form factor budget handheld with the same internal specs as the RG35XX Plus. Aside from having the same internals, this device also includes two joysticks to use for those upper end systems that the RG35XX H can handle like N64, Dreamcast or PSP.
If you are looking for a Starter Guide on the original RG35XX, check it out here
Overall, the performance lies somewhere between the RG351 (rk3326) series and the RG353 (rk3566) series.
I think that this device can make for a great budget introduction handheld for newcomers to the retro handheld space for anyone looking to play PS1 or below. If you received this device as a gift or are looking to set it up for yourself, this guide will help you to get started. So, let’s get to it!
Where to buy the RG35XX H
RG35XX H Specifications
- CPU: AllWinner H700 – 4x Cortex A53 @ 1.5GHz
- GPU: Mali-G31 MP2
- RAM: 1GB LPDDR4
- Storage: 2x Micro SD Card
- Display: 3.5″ 640×480
- Battery: 3300 mAh
- Connectivity: Wifi 5/Bluetooth 4.2
With these specs, the RG35xx H is capable of emulating everything up to PS1 easily but is also capable of emulating some N64, Dreamcast, and PSP games as well.
Keep in mind that those upper-end systems cannot be fully emulated so there will be games that are simply beyond the reach of this handheld so if those systems are a priority, be sure to check out gameplay videos or do your research to ensure the game that you want to play is possible on this device.
Getting Started with the RG35xx H
To turn on the RG35XX H, the power button is located on the right side of the device. Simply down the power button for approx 5 seconds until you see the green indicator light turn on and the Anbernic logo appears. The initial boot sequence is around 20 seconds until you land on the main menu.
The Reset button is located below the power button on the right side and the volume buttons are on the left side of the device.
Along the top is a 3.5mm headphone jack, a USB C OTG port, a mini HDMI output, a second USB C power for charging, and a function button.
RG35XX H Quick Buttons
- Power Button (short press) = Sleep the device – the battery will drain slowly while sleeping
- Power Button (long press) = Power Off the device
- Function button (in menu) = Stock OS settings menu
- Function button (in game) = Retroarch or Settings menu depending on the system
- A button = select item
- B button = back
- Start Button = (in menu) = Set item as a favorite
- Start + Function button = Quit to the main menu
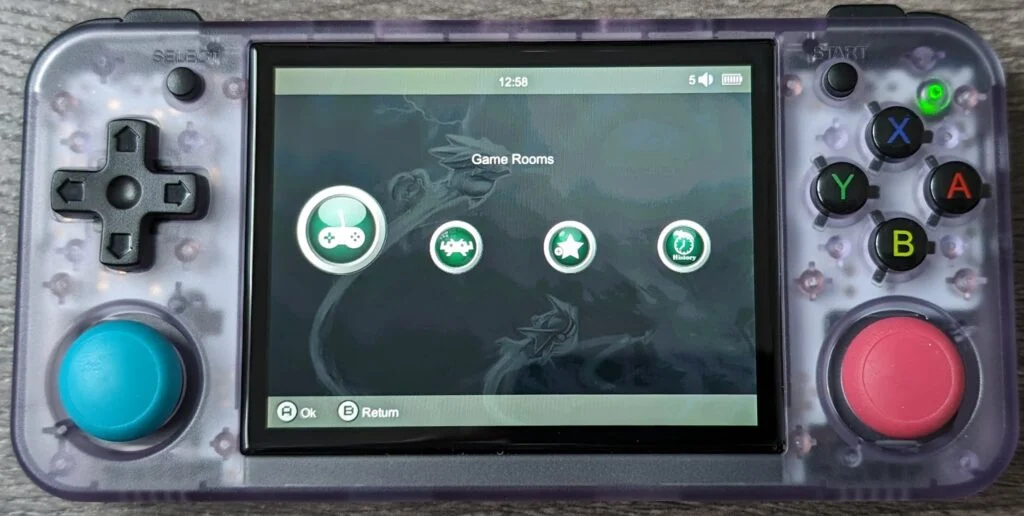
The Stock OS main menu is fairly easy to navigate. It has an option for Game Rooms which is further divide by each game system.
The RA Game option is very similar to the Game Room option except that it is presented as tiled icons rather than a menu. It also has further options for Ports and Apps as well as access to PSP and N64 games.
The RG35xx H Ports menu item has a number of PC ports of older games as well as some fan-made games. In this area, you will find games like Cave Story, Quake, or Wolfenstein.
The next few items on the main menu are pretty intuitive, here you will find Favorites where you can add favorite games into this section by pressing the Start button on a game in your Game Rooms. Next is History which shows you the last games you played, and Search to find games in any games by title.
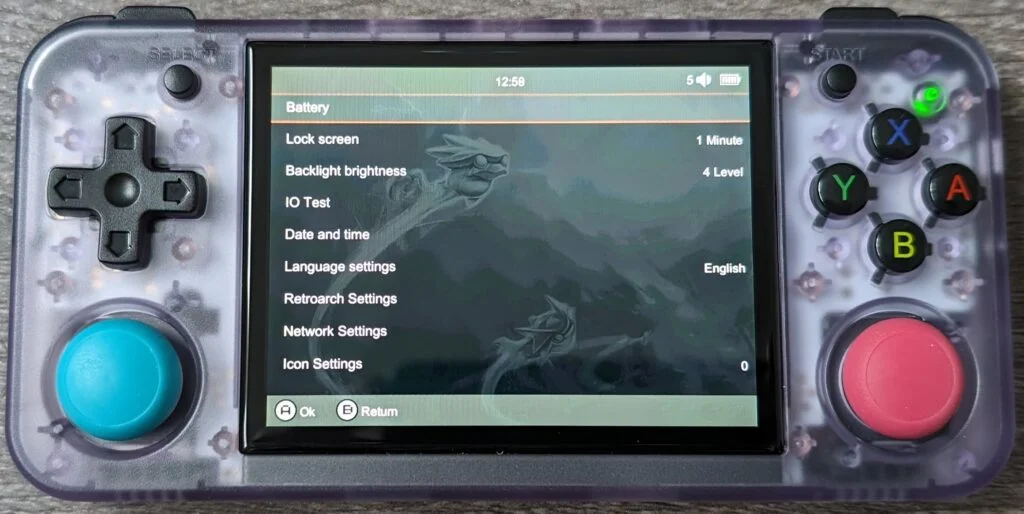
Last on the main menu is the Settings. Here you will find settings for screen time out, button testing and mapping, language settings, etc.
How to connect RG35XX H to Wifi
The RG35XX H has built-in wifi and can be used for retro achievements. To connect to wifi, go to the Settings menu and scroll to Network Settings. Under this menu you will find WIFI Settings where you need to turn ON Enable Wifi.
Once ON, search for your network in the WIFI Name and add your network password in WIFI Password then press Start to join the network.
Assuming your wifi name and password are valid, the Status should change to Connected and display your network name and IP address.
How to Add Games to RG35XX H
The RG35XX H supports two simultaneous SD cards. Both cards can be used to store your games at the same time.
If you plan to use just a single SD card for both your OS and your games, then to add games to the RG35XX H, simply pop the SD card out of the TF1 slot and into your PC.
If you are looking for an SD card reader, I’m currently using this Dual SD Card reader from Amazon.
RG35XX H Single Card Setup
To add games to the RG35XX H primary SD card, find the ROMS folder and inside this folder are subfolders for each of the game systems to be emulated.
Simply find the corresponding folder for the game system you want to emulate and drop the ROM for that game into the folder. One the next restart of the system, the game should show up.
Note that box art for each game is stored in a subfolder for each system called Imgs. Each box art image is a 282 x 216px png file and must have the exact same name as the corresponding ROM file in order to be displayed in the menu.
RG35XX H Dual Card Setup
It is also possible to add a second SD card to the RG35XX H which is used only to store additional ROMS. To use this setup, insert your blank SD card into the TF2/EXT slot and turn on the device. This will format the SD card with the file structure necessary to store you ROMS on the second SD.
Now remove the TF2 SD card and insert it into your PC. The second SD card now contains only two subfolders, one for ROMS and one called Save.
To store your ROMS on the second SD card, simply save the game ROM to the corresponding system subfolder in the ROMS folder the same as you would in a single SD card setup.
RG35XX H Emulator Setup
Most of the emulators on the Stock OS have been configured well enough for compatibility with the RG35XX H so they should be relatively plug-and-play. Booting up a game for each system should run your game without any issues or slowdowns.
With that said, there are a few tweaks that I recommend making to squeeze a bit more performance out of the higher end systems to allow for a smoother experience.
RG35XX H N64 Emulation
The default emulator for N64 emulation is the Retroarch Parallel Core. The RG35XX H does not have enough power to emulate every N64 game and so you will have to make some tradeoffs when it comes to trying to emulate your favorite game.
My recommendation is to set the GFX Plugin to Gln64 for the entire Parallel core. I find this to be a good tradeoff between Performance and Compatibility.
Ultimately if you are looking for pure performance, the Rice GFX Plugin will give you the most performance at the cost of introducing graphical glitches like flickering textures in some games.
You can also change the core from Parallel to the Mupen64plus_next Retroarch core by pressing the Y button in the OS menu before starting the game. The Mupen core is more accurate and some games like Ocarina of Time seem to work better and look better with this core instead.
For the most part, the Gln64 GFX Plugin will give you decent performance on the games that the device can handle without introducing graphical errors but you may have to experiment with different plugins on a game by game basis to see what works best.
To change the GFX Plugin for the N64 Retroarch cores, first start any N64 game. While in the game, press the Function key at the top of the console to open the Retroarch setting.
In the quick menu, scroll down and select Options and find the GFX Plugin option and set it to Gln64.
To save this option for all N64 games, go back to the Quick Menu by pressing B, then scroll to the bottom and find Overrides. In the Overrides menu, select Save Core Overries – you should see a save message popup in the lower left corner.
RG35XX H PSP Emulation
The default emulator for PSP is the PPSSPP standalone emulator. Keep in mind that not all PSP games will run but you can improve the performance a little bit with the following changes.
Boot up a PSP game then press the Function button to access the PPSSPP settings. Scroll down to the Settings menu and adjust the following
- Skip GPU Readbacks = Yes
- Lazy texture caching = Yes
- Spline/Bezier curves = Low
- Anisotropic Filtering = Off
To exit a PSP game on the RG35XX H – press the Function key then scroll down to Exit to Menu then at the menu scroll to Exit.
In some cases, it is also possible to squeeze some extra performance out of your PSP games using the PPSSPP Cheats tool.
To use cheats in PPSSPP you first need to obtain a Cheats.db file. I find the CWCheats Database Plus to be the most comprehensive around. On the github page, grab the cheats.db file and save it to your local computer.
CWCheats Database Plus github link: https://github.com/Saramagrean/CWCheat-Database-Plus-
Once you have the cheats.db, you will need to store it on your RG35XX H SD card. In a dual card setup, you will need to grab the SD card where your PSP roms are stored.
Copy the cheats.db file into the following location for the Stock OS: \.config\ppsspp\PSP\Cheats
This location differs depending on the CFW that you are using so be sure to check the documentation for other specific CFWs
Now in PPSSPP settings menu and navigate to: Settings -> System -> Enable cheats and ensure that this item is enabled.
To use cheats, open a game and select Cheats from the menu. You may need to click on Import from PSP/Cheats/cheats.db option to display the list of available cheats from the Cheats column.
Note that there are different cheats available for each game and not all games have performance enhancing cheats like FPS locks or disabling graphics etc.
RG35XX H Dreamcast Emulation
The RG35XX H is capable of some Dreamcast emulation. The default emulator is set up to use the Retroarch Flycast core and it is already configured to run your games as long as they are in the correct folder.
There aren’t really any adjustments required to get your Dreamcast games running other than placing them in the ROMS/Dreamcast folder.
While testing Dreamcast, I ran into a lot of difficulting finding a ROM format that would work. I would regularly run into an issue where the core would open to the Naomi bios and tell me there was an error loading the game.
What ultimately worked for me was using GDI format ROMS and then compressing the ROMS into a CHD file. The CHD files would open correctly for me from the main menu as long as they were compressed from a GDI file.
You’ll have to find your own GDI ROMS, but I have a guide on compressing ROM files including into CHD format. Be sure to check out my How to Compress ROMs files to Save Space guide for links to the tools you’ll need to make your own CHD compressed ROM.
How to Update the Stock Firmware on the RG35XX H
Unfortunately, the stock OS on the RG35XX H does not support OTA updates so you will have to download the latest firmware version and create a new OS SD card by burning the image to a blank SD card.
There are several great RG35XX H Custom Firmware options currently in development. Be sure to check out my RG35XX H Custom Firmware Guide for the latest on CFW for the RG35XX H
Anbernic maintains an official download page for their RG35XX H stock firmware. This page is updated as new firmware is released.
Official Anbernic Stock Firmware Download link: https://win.anbernic.com/download/360.html
Anbernic is currently only providing full firmware images and has no lossless upgrade path available. That means that you will have to start with a fresh install each time you want to update the firmware.
Luckily, someone in the community is maintaining stripped down versions of the official Anbernic images which removes any of the included games but also offers access to the boot partition in case you want to customize the boot logo.
The link below offers both images of the full OS only (no games) as well as an upgrade option that can be used to upgrade the OS without data loss.
Unofficial Modified Stock Firmware Download link: https://github.com/cbepx-me/RG35xx-P-RG35xx-H-Modification
Once you have your new image file, extract it to a temporary folder and use an image writing software such as Rufus or Balena Etcher to burn the image to a new SD Card. Be sure to use a high quality SD card like one of the ones I recommend below
For a more in-depth write-up on how to write an image to an SD card, check out my Installing Custom Firmware (CFW) on the RG353. The image burning process is the same. Just be sure you have an RG35XX H image from one of the links above.
RG35XX H Accessories
- This 2.5″ HDD Carry Case for the WD Passport from Amazon is snug fit but is cheap and works well from Amazon
- Or you can try this custom printed carry case with magnetic clasp from Etsy
- There is also this slim custom printed case from Etsy
- This Grip and Case Cover-in-one combo from Etsy works double duty!
- Or a larger grip that extends the handholds down from Etsy is another great grip option
- You can connect your RG35XX H to a TV using a mini HDMI to HDMI cable
More Reading..
-
RG35XX H Custom Firmware Guide
The RG35XX H custom firmware scene is very new, so there are not a lot of fully developed solutions at this point. Unlike many of the other Anbernic handhelds released over the last few years, the RG35XX H and RG35XX…