Powkiddy RGB30 Setup Guide
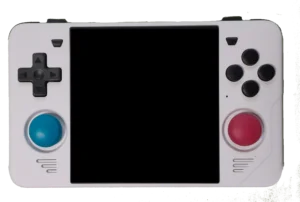
The Powkiddy RGB30 is a new device using the RK3566 chipset that has been in many devices this year including a number of other devices from Powkiddy and Anbernic. Where the RGB30 innovates is in the 1:1 (720 x 720px) aspect ratio screen. This screen ratio offers a surprising versatility to the device that you might not expect and with a sub $100 USD price, makes this one of the better of 2023.
If you are thinking of getting a Powkiddy RGB30 or just got one and need to know how to get started, you’ve come to the right place. In my RGB30 Setup Guide, I will walk you through everything that you need to know to get your device set up and ready! So, let’s get started.
Where to buy the RGB30
RGB30 Specifications
- Chipset: rockchip RK3566
- RAM: 1GB
- Battery: 4100mA
- Screen: 4in 1:1 ratio (720x720px)
- Connectivity: Wifi + Bluetooth
- Output: Mini HDMI TV out, 3.5mm headphone, OTG-USB-C
Getting Started – First Boot
The Powkiddy RGB30 comes pre-installed with JELOS which is a mature firmware that is available on a number of devices and is fairly easy and intuitive to use.
There are a number of other firmware options that are also available for this device and if you are interested in a comparative guide and installation instructions for the RGB30 custom firmware, be sure to check out my Powkiddy RGB30 CFW Guide
When you first boot up the RGB30 the system will go through an initialization process then drop you into the main menu.
RGB30 Main Menu buttons Reference Guide
- Dpad/Analog Sticks: Menu Navigation
- A Button: Select item
- B Button: Back out of menu
- X Button: Selected Item context menu
- Y Button: Search
- Start Button: JELOS Settings Menu
- Select Button (Main Menu): Quick Shutdown/Reset menu
- Select Button (Submenu): Submenu Quick Menu settings (filter, custom menu style)
How to enable WIFI on the RGB30
The first thing that I did when I booted up the RGB30 is Enable WIFI. To enable WIFI on the RGB30, you need to press the Start Button and scroll down to Network Settings. Next menu scroll down to Enable Network and toggle this to the On position.
To save the settings you then need to back out of the menu with the B button or Back menu item. This will enable the basic WIFI so that we can search for a network.
Now that WIFI is enabled, go back to the Network Settings menu and scroll down to WIFI SSID and select the item. Here you should now be able to see a list of nearby networks where you can select your own network.
Next, go to the WIFI Key menu and use the onscreen keyboard to enter your WIFI password. To save the item, find the checkmark icon on the far right of the keyboard.
To save your settings, back out of the network settings menu. You should now see the WIFI symbol appear in the top right corner of your display beside the battery indicator.
Check for JELOS updates
JELOS is regularly being updated so it is very likely that a new update has been released since you received your device.
To check for new updates, first enable WIFI using the steps above. Now go to the JELOS settings menu by pressing the Start Button. Scroll down to System Settings to find the System Update section. Click Start Update
When the update starts, you’ll see a Working… icon then eventually a message that says The system will download and install the Update, continue? Press Yes
From here, the system will restart and you’ll see a bunch of text begin to scroll down the screen. This is the update process downloading and installing the necessary files. This process will take about 5 minutes so just be patient while it finishes.
Eventually, the system will restart and set you back to the JELOS main menu.
How to charge the RGB30
The Powkiddy RGB30 is a bit quirky when it comes to charging. The first thing you need to know is that the device will only charge with a USB A to USB C charger with a max output of 3A. Using the charging cable included is your best option.
Also, when charging the device, you can only plug the cable into the USB C slot labelled as USB (not the OTG port).
Last thing to note: if your device fully discharges for whatever reason and will not charge or power on, you will need to open the device and disconnect the battery for at least 30 seconds then plug it back in before attempting to charge it again.
Other useful RGB30 Setup
Set the Power Button to Deep Sleep. By default, the power button when pressed will set the device into a low level sleep mode which basically just turns the screen off but keeps everything else running which causes battery drain issues.
To set Deep Sleep for the power button, press the Start button to go into the Settings, then choose System Settings. Scroll down to find the Device Suspend Mode and set it to Deep (S3). This should basically turn everything off except for the RAM which should save you battery when you press the power button.
Set the system to auto-save state on game Exit. This is a useful feature that allows you to automatically resume a game exactly where you left off when you exit the game. The next time you start a game, you can use the Start Save State option to resume a game.
To turn on this feature, press the Start button to go into Settings, then choose Game Settings. In here you will find an Auto Save/Load option that you can set to Show Save States if not Empty which you will need to set in order to be able to auto save and load games when you launch or exit.
ArkOS Quick Mode
One of my most loved features of GarlicOS for my RG35xx is now available in ArkOS and can be used on the RGB30. That is the ability to hit the power button and have the system save state and power down. When I power back on, I am back in the game I quit exactly where I left off.
This feature can be enabled with two the combination of two features in ArkOS. The first feature is called “quick mode” and this allows for the system to automatically create a save state when you press the power button. This feature can be enabled via the Options -> Advanced menu with “enable quick mode”.
Combine this with setting the power button to turn the device off rather than sleep by pressing the Start button -> Advanced Settings -> Switch Power Button Tap to Off.
Now when you press the power button, the system creates a save state and powers the device off. This is better than sleeping as sleep will still drain the battery.
When you turn the device back on, it opens the save state and picks up in the game exactly where you left off.
How to Add Games to RGB30
Create a Games SD Card
The RGB30 supports a dual SD card setup which means that ideally, you will store the OS on a smaller SD card in the card slot marked TF-OS on the bottom of the device and all of your games on a larger SD card in the card slot marked TFGAME.
In this setup, we will want to use a high-quality, larger SD card and insert it in the slot marked TFGAME then turn on your RGB30. When you first boot up the device with a new SD card in the TFGAME slot, JELOS will automatically format this card for you and create the necessary file structure needed to read the games for each game system.
If you need an SD card, I recommend at least a 32GB card depending on which game consoles you plan to emulate. Below are a few reputable brands that I recommend that can be picked up on Amazon.
Adding Games to your SD Card Directly
Once the games SD card has been formatted for the second time, you can turn off your RGB30 and eject the SD card. Using a Windows PC, you can insert the game card into your computer and it should automatically be read by Windows and assigned a drive letter.
The SD card will have a number of different subfolders each named for a different console. You’ll want to drop the games for each emulated console into its respective folder.
Keep in mind that each emulated game system will have a different file extension for the game files. Some systems require multiple files per game while other systems’ game files can be compressed to save room.
For more information on compressing ROMS to save space, be sure to check out my guide on How to Compress ROMs files to Save Space
When you’ve finished transferring your game files, safely eject the SD card from your PC and insert it back into your RGB30. You’ll need to restart your device if it was on in order for the operating system to read the new files.
Transferring Games via SSH/FTP or Samba
To transfer files to the TF-OS SD card or to transfer files wirelessly, you can use the built-in WIFI to connect via FTP. Follow the steps found above to first enable WIFI on your RGB30.
With WIFI enabled, we will also need to Enable SSH and Enable Samba which are options that can be found under the Network Settings menu by pressing Start from the main menu.
With these two options enabled, you can connect directly to folders on both the OS as well as the GAME SD cards via FTP or using the File Explorer.
To connect to either Samba or FTP, you’ll first need two pieces of information
Under Network Settings, you’ll need the IP Address that has been assigned to the device.
Under System Settings, you’ll need the Root Password that was assigned at boot.
Samba (File Explorer Drag and Drop)
To connect via Samba, simply open your Windows Explorer and in the Address bar type \\<IP Address>
So for example, \\192.168.155.125
When prompted for a username and password, the username is root and the password is the root password assigned in System Settings
This will give you access to some of the OS folders as well the ROMS folder which could be on your GAMES SD card. Now you can simply drag and drop files into those folder to transfer the games.
FTP
To connect via FTP, open an FTP client like FileZilla and in the connection options type in your IP address as well as the username: root and password is the root password assigned in System Settings.
Via FTP you have more direct access to the entire folder structure on the OS card. To transfer your games, they will need to be placed in the ROMS folder and the corresponding subfolder for the emulated system.
Adding BIOS files
Some systems will require BIOS files to boot games or just for better compatibility. Adding the BIOS files will be the same process as adding games. The BIOS files will go into the BIOS folder found under the ROMS folder.
Here is a list of some of the BIOS files that you’ll need for each system.
| System | Bios Files |
|---|---|
| Game Boy | gb_bios.bin |
| Game Boy Color | gbc_bios.bin |
| Game Boy Advance | gba_bios.bin |
| Neo Geo | neogeo.zip |
| Sega CD | bios_CD_E.bin bios_CD_J.bin bios_CD_U.bin |
| TurboGrafx-CD | syscard1.pce syscard2.pce syscard3.pce |
| Playstation | scph1001.bin |
| Sega Saturn | saturn_bios.bin |
| Dreamcast | dc_boot.bin |
RGB30 Ports and PortMaster
In addition to emulating home and handheld consoles, the RGB30 also features PortMaster which is a tool that streamlines the installation of PC ports of old and modern games.
PortMaster features many free, ready to run games as well as the files needed to run some retail games both old and new.
For more information on using PortMaster to play PC ports on the RGB30, be sure to check out my Powkiddy RGB30 Ports and Portmaster guide.
Connecting Controllers to the RGB30
Controllers can be connected to the RGB30 via two methods: OTG or Bluetooth.
OTG via USBC cable
To connect a wired controller to the RGB30, simply plug the device into the OTG port found at the bottom of the RGB30. You can use a USB-A to USB-C adaptor to connect any PC compatible USB controller directly to the device and it should be detected automatically.
Next step is to go into the RGB Setup menu by pressing the Start Button and then Controller & Bluetooth Settings then Controller Mapping to assign the USB controller buttons to the corresponding buttons to be recognized in retroarch emulated systems.
You can also plug in a USB hub to connect multiple USB controllers to the device and assign each to a different player in the Controller settings.
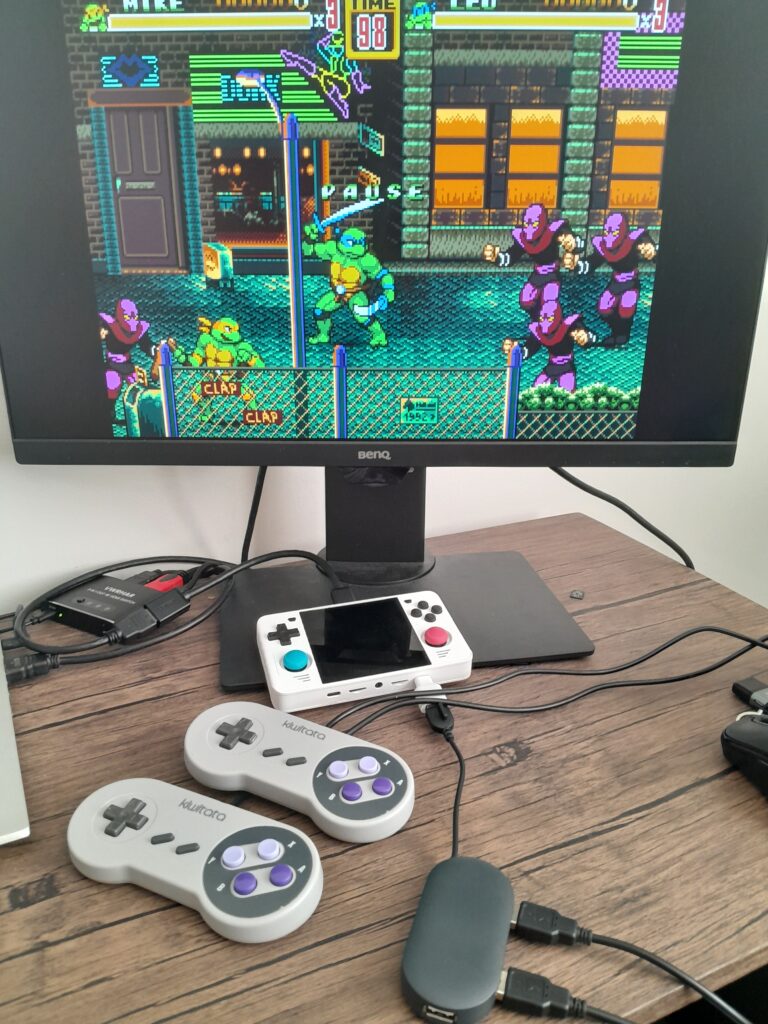
Turn your RGB30 into a portable game console and connect it to a TV with just a few simple add-ons
Grab some wired 8bitdo controllers with a SNES inspired design
Use a USB hub to connect multiple controllers at once
Connect the RGB30 to a TV via a mini HDMI to HDMI adapter
That’s it! Configure your controllers in the controller mapping section and make sure your HDMI is plugged in before you turn on your device and now you have a portable console that you can plug in anywhere and play with multiple players at once!
Bluetooth
To connect a Bluetooth controller to the RG30, open the JELOS system menu with the Start Button and go to the Controller & Bluetooth Settings menu.
In the menu you need to turn on the Enable Bluetooth option. Once enabled, I had to restart my device in order to pair my controller using the next step.
With Bluetooth enabled, turn on your controller into pairing mode then select Pair a Bluetooth Device from the RGB30 Bluetooth settings. You should see a message in the top right saying that your device was successfully paired.
Next, go to the Controller Mapping menu item and go through the mapping process to assign the controller keys to the right buttons.
If you plan to connect your device up to a TV via the HDMI port and use your Bluetooth controller as the first player, set the P1’s Controller option to the connected controller and it will automatically detect your controller in retroarch based emulators.
RGB30 Accessories
- Gulikit Hall Effect Joysticks – The joysticks in the RGB30 are standard Joycon size and can therefore be upgraded to Hall Effect joysticks which should have higher sensitivity and be immune to drifting
- Connect the RGB30 to a TV for big screen output with a Mini HDMI to HDMI cable
- The joysticks are standard Joycon sized so if you are looking to accessorize, any Joycon thumb grip cap works to help personalize the appearance
- If you are looking for a carrying case, check out this custom printed case with magnetic clasp from Etsy
- Or you can try this hardshell custom printed case from Etsy
- This dual purpose grip and cover is a great idea from a print shop on Etsy
- SakuraRetroModding also has some cool custom printed SNES style buttons on Etsy
More Reading…
-
Powkiddy RGB30 Ports and Portmaster
The Powkiddy RGB30 is not only capable of emulating home and handheld consoles all the way up through Dreamcast and N64, but did you know that it…
-
Powkiddy RGB30 CFW Guide
In this guide, I will explore some of the other RGB30 CFW options available and discuss their pros and cons and who might want to use them….