Vita3K Android Setup Guide
In my Vita3k Android setup guide, I will be showing you how to set up and install the PS Vita Android emulator known as Vita3K.
Introduction
PS Vita emulation on Android devices like the AYN Odin, Anbernic RG405, or Retroid Pocket 3+/4 is very new and the development is still in its early stages. In early 2023, Macdu released the first version of the PS Vita emulator Vita3K designed for all of the major operating systems including an Android app.
First and foremost, I want to set some expectations here. PS Vita emulation on Android is still very new and still a work in progress. While using the app, you can expect there to be lots of unexpected app crashes, glitches and graphical issues and many games will simply fail to load.
As of Vita3k version 10, many of the games that can be played are limited to 2d games and indie games, however, there are a few notable AAA 3d games that are completely or mostly playable on your Android device.
With those expectations set, let’s take a look at how to set up PS Vita emulation on your Android device.
How to install Vita3K
The first thing that you will need to do is grab the latest build from the official Vita3K website. The Vita3K app does not currently support OTA updates so you’ll want to check back occasionally for new updates.
Vita3K download link: https://vita3k.org/
Scroll down to the Download section and click on the Android Nightlies link. This will bring you to the GitHub releases page for the Android build. The top post will show you the latest release and changelog and under the assets section at the bottom of the post will be a link to the .apk file
Once you have the latest APK, open it up and install it on your system as you would any other Android app
Vita3K Turnip Drivers for Snapdragon
An interesting feature of the Vita3K emulator is that it allows you to use graphics drivers other than the ones that come pre-installed on Snapdragon chips like those included in the AYN Odin. Similar to the Skyline emulator, Vita3K can also use Turnip drivers which are custom-built drivers using an open source standard.
While Turnip drivers do work great on some Android systems, personally I would not recommend them for the AYN Odin Pro in most cases.
There are other drivers which have much better compatibility on the AYN Odin Pro, specifically the Qualcomm v615.37 and v615.40 drivers.
Grab the latest drivers from KIMCHI’s github here: https://github.com/K11MCH1/AdrenoToolsDrivers/releases
I recommend that you get the following drivers
- Qualcomm Driver v615.37
- Qualcomm Driver v615.40
- The latest Turnip driver (Turnip-v22.3.6-r1 as of writing this)
- Turnip Driver Version 12
Simply download the .zip file from the assets sections of the corresponding drivers and store them in a Drivers subfolder you can create inside your PS Vita roms folder.
Vita3K Setup
Now that we have everything we need, open the Vita3K app for the first time configuration.
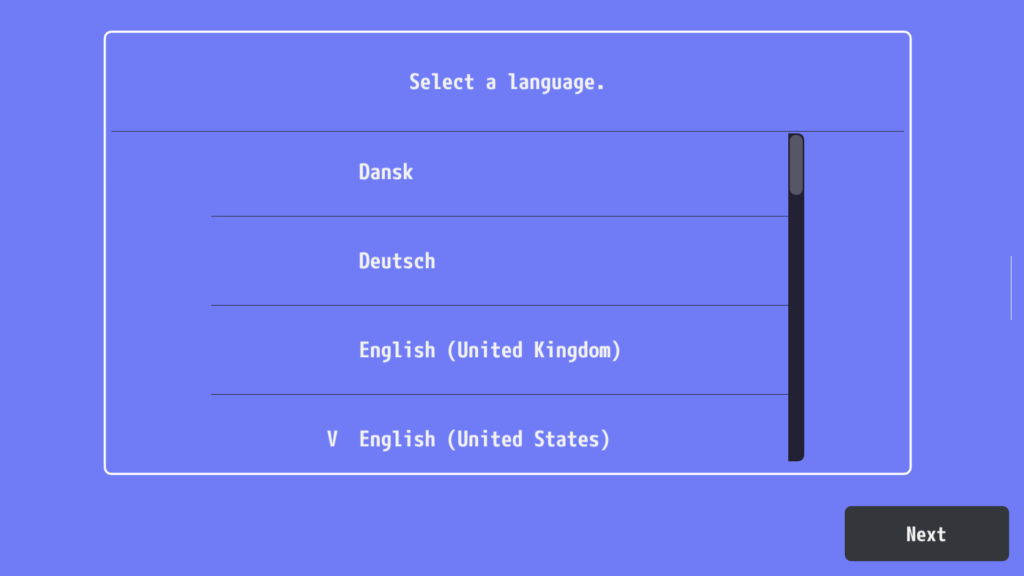
The first screen you’ll see is the Language Select screen. Here you will pick the language that you want to use the app in then press the Next button. The ‘V’ beside the options throughout this app represents a checkmark and indicates the selected item.
Vita3K firmware
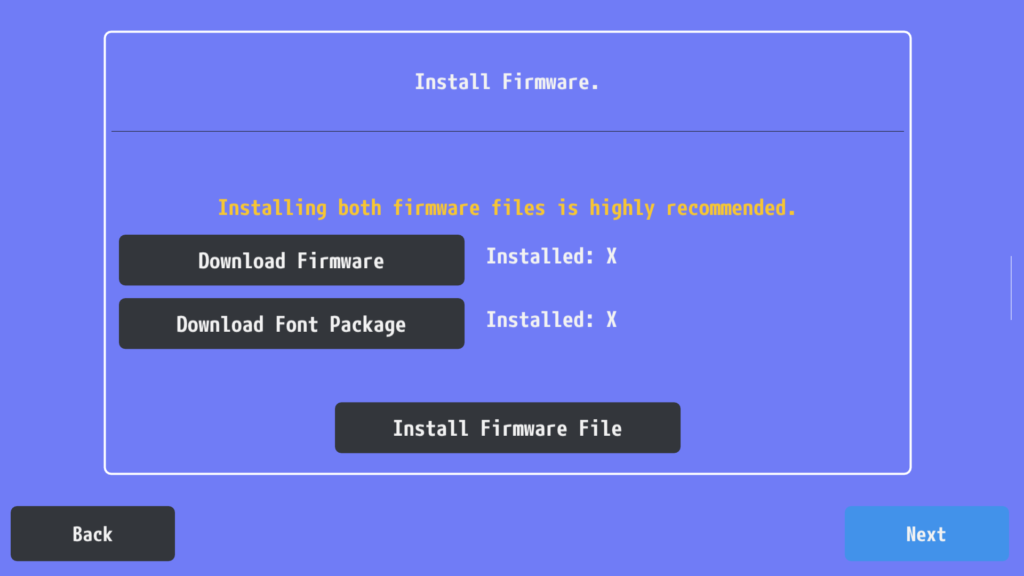
The next screen requires you to install the vita3k firmware.
Luckily, Sony provides all of the official firmware files that you’ll need for free on their website. Simply follow the Download Firmware link on the screen.
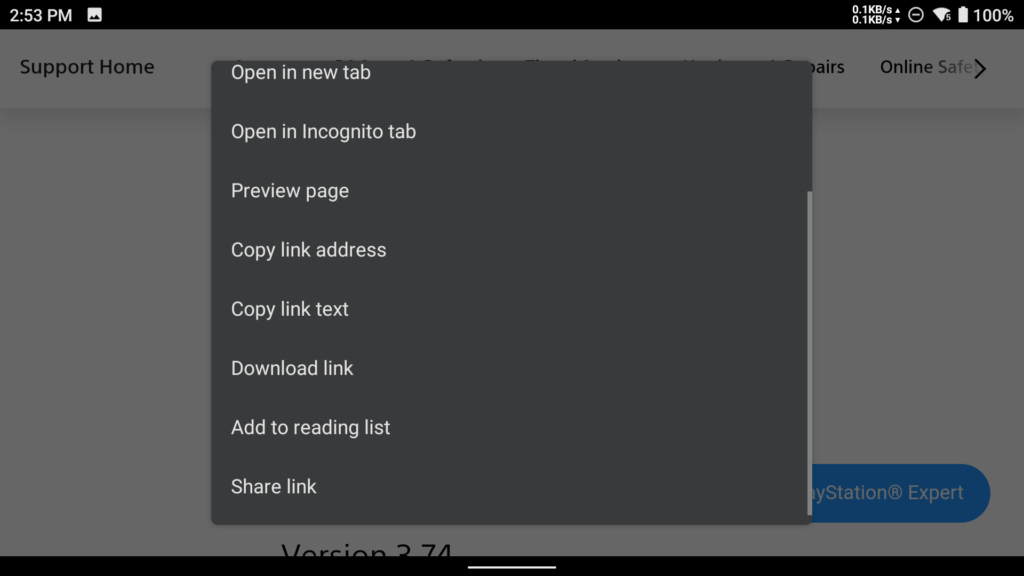
This will bring you to the official Sony website where they have an option to download the latest firmware update for the PS Vita (3.74 as of this writing).
Simply tapping on the Download update button didn’t initiate the download for me so I had to long press on the button to bring up the context menu and select Download Link to download the file.

Follow the same steps for Download Font Package to download the additional resource file required.
Next, press the Install Firmware button in the Vita3K setup wizard. You’ll need to install the Firmware and the Font Package separately.
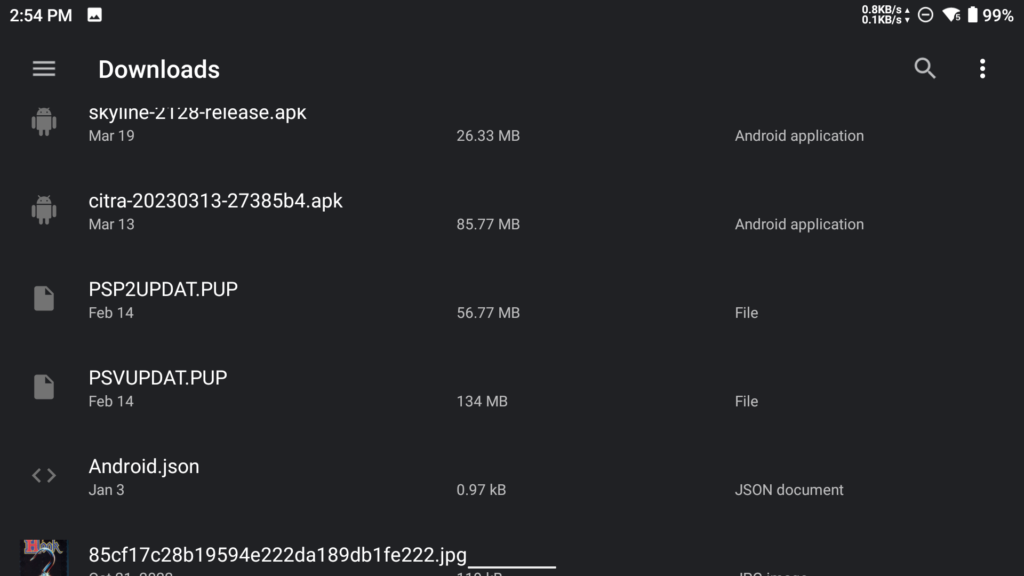
When you press the Install Firmware button you will get the Android file browser. You need to go to your download folder and select the PSP2UPDAT.PUP file. This will initiate the firmware install.
Repeat this step for the PSVUPDAT.PUP file to install the Font Package

When you are done, the X beside the two packages should change to a V. Click Next to proceed to the next page.
Vita3K Configuration
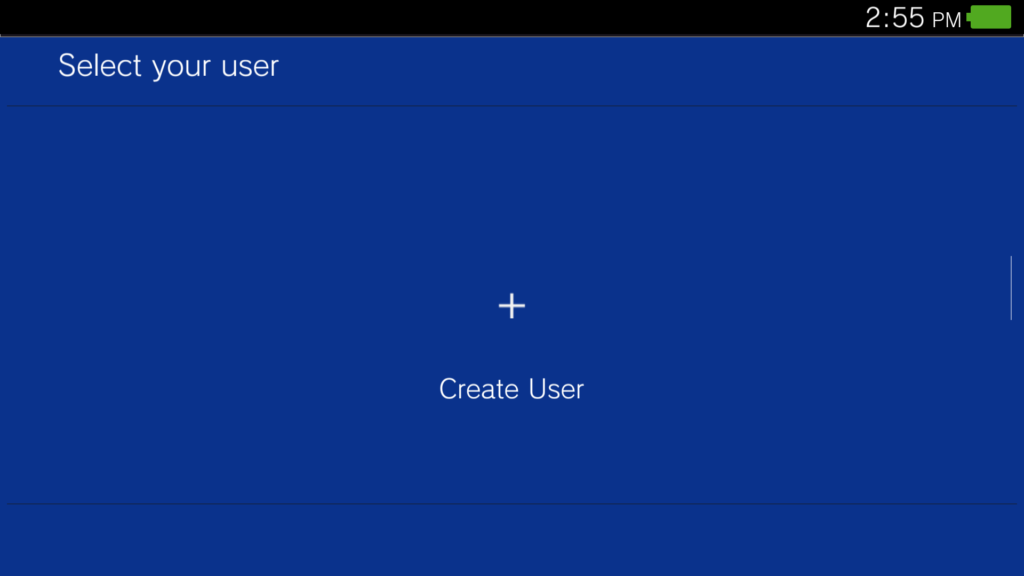
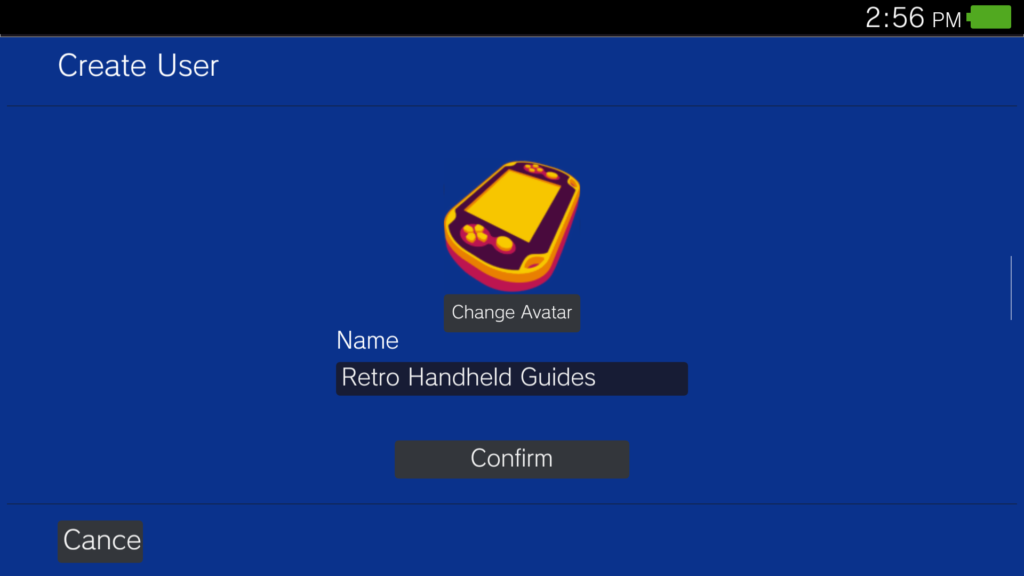
Now that the firmware is installed, the next step is to create the PS Vita user profile. Click the + button to create a new user and name it. Once created, you can select your new user profile.

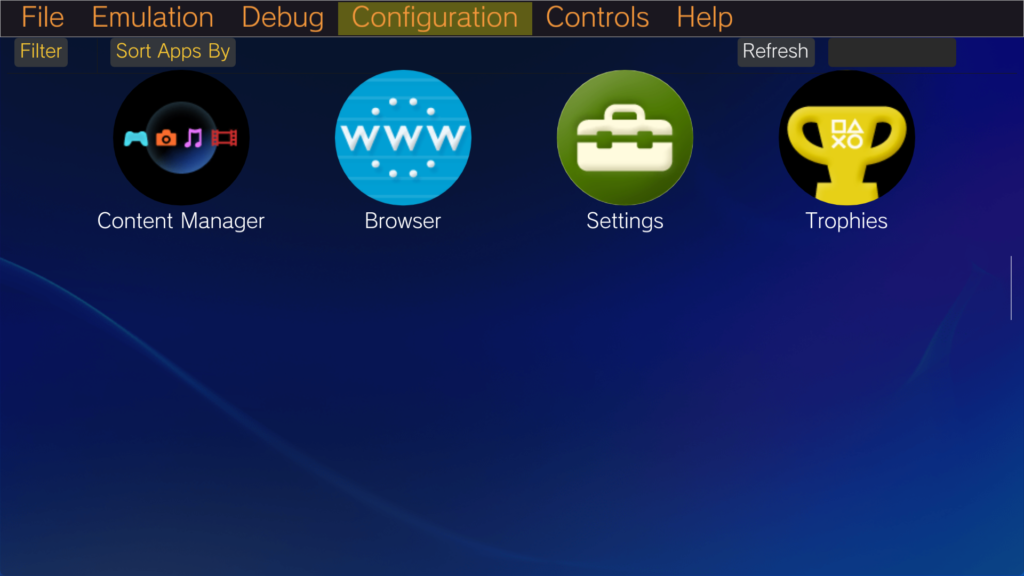
After selecting your user profile, you will be dropped onto the PS Vita3K home screen where we can begin our configuration.
If you tap in the top area, you will see a menu and an option for Configuration. Tap this item and select Settings
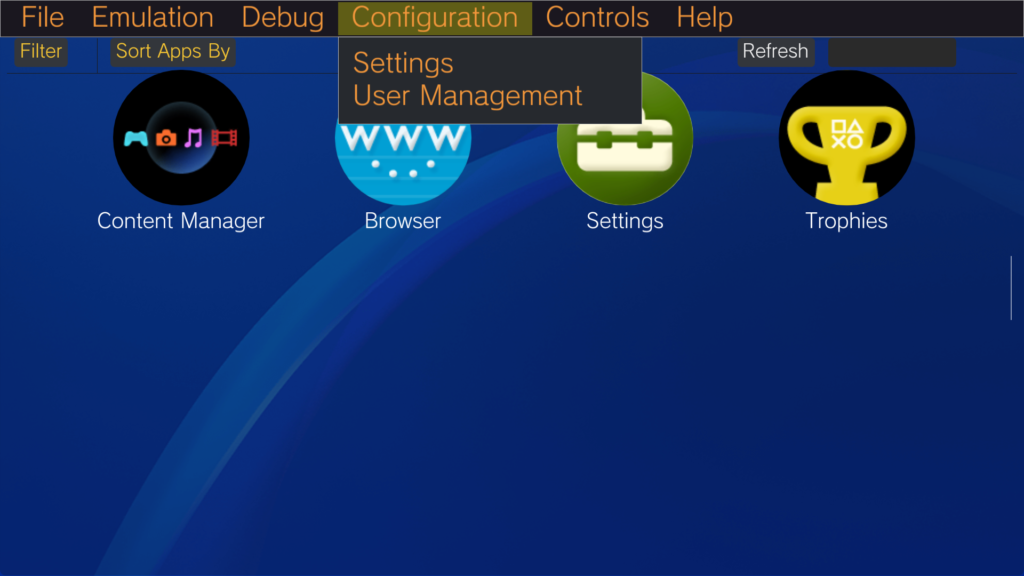
Under the settings menu, you’ll want to tap on the GPU tab and ensure that Vulkan is selected for the backend.
Tap on the Add Custom Driver option to install your custom Qualcomm and Turnip drivers. The right driver will depend on the game but I use the Qualcomm v615.37 driver as my default and change it from there on a case by case basis.

Vita3K How to Install Games
Vita3K Roms
The next thing that you’ll need is your games. The Vita3K emulator supports commercial games dumped via the NoNpDrm tool. It also works with homebrew games which you can pick up at VitaDB. Vitamin dumps are not currently supported.
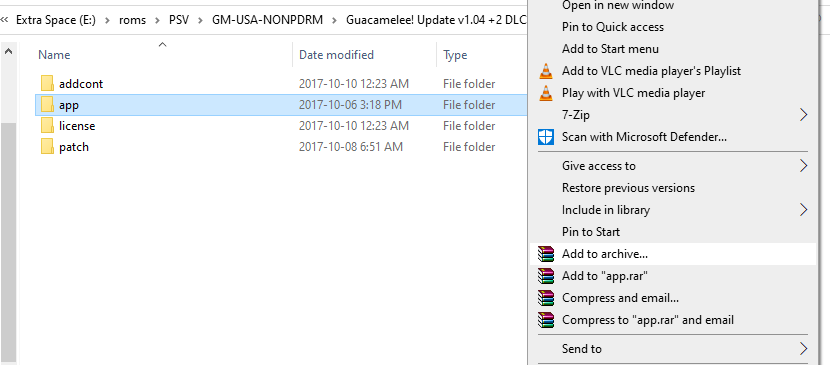
Depending on how you sourced your roms, the file format may differ. I’ve sourced my roms as NoNpDRM dumps and they came as a .7z file.
The Vita3K emulator will only allow you to install .zip files so you will need to repackage these .7z files as .zip
Simply extract the contents of your .7z file into a temp folder then use your favorite zip software (I use WinRar) to zip the ‘app’ folder back up.
How to Install Games in Vita3K
While Macdu has done a lot of work to get to this point with the Vita3K emulator, it is still very new. Before you try to play any games, I recommend that you check out the Vita3K compatibility list to see if the game has been tested by anyone else in the community or has any known issues. Note: Just because someone else has said that they got the game working, it does not guarantee that it will work on your specific device
Now that we have completed the initial setup we need to install our games. For that, tap on the top bar and select File then Install .zip
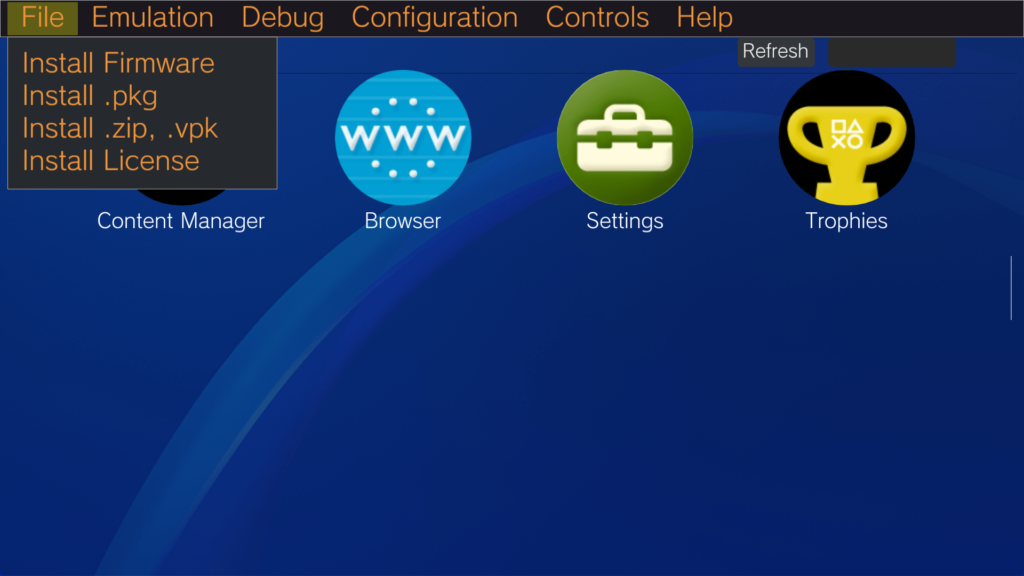
Find your .zip rom file and let the process install the game. This can take up to a minute to finish.
Assuming the game is installed properly, it should appear on your Content.
To start the game, just tap on it from your content list and press the Start tile that appears on the dashboard.
More Reading…
-
Miyoo A30 Custom Firmware Guide
The Miyoo A30 is still a very new device and as a result, it does not yet have any “true”…
-
Miyoo A30 Setup Guide
The Miyoo A30 is a very small, horizontal form factor retro handheld. With a 2.8″ IPS screen, the Miyoo A30…
-
TrimUI Smart Pro Custom Firmware Guide
The TrimUI Smart Pro uses a relatively new chipset not seen in many other retro handheld devices and as a…
-
TrimUI Smart Pro Setup Guide
The TrimUI Smart Pro is a horizontal form factor retro handheld device capable of emulating up to PS1 reliably with…
-
Stardew Valley v1.6 via PortMaster
Did you know that your favorite rockchip (RG353, R36S, RGB30) retro handheld is capable of playing Stardew Valley via Portmaster?…
-
Best Android Emulator Frontend
With the rise of Android based retro handhelds, turning a retro handheld from just a glorified Android phone with a…