RP2S PS2 Emulation Guide
The Retroid Pocket 2S is a surprisingly capable mid-range emulation handheld. Based on a slightly less powerful version of the chip used in the RP3+ and RG405M, the RP2S can emulate some PS2 games.
In this guide, I will show you how to get started with RP2S PS2 emulation and give you some tips and tricks on maximizing your performance.
For a full starter guide on the RP2S, be sure to check out my Retroid Pocket 2S Starter Guide
RP2S PS2 Emulator
For the Retroid Pocket 2S PS2 emulation, you’ll want to pick up an app called NetherSX2.
NetherSX2 is a fork of AetherSX2. There is a long and storied history with this app but needless to say, it is no longer being developed and has been removed from the Google Play app store and the website has been shut down.
Luckily, a developer has picked up the torch and, despite AetherSX2 being mostly closed source, they have managed to make some small improvements to the app and it is still available for download.
NetherSX2 Patcher Github link: https://github.com/Trixarian/NetherSX2-patch/releases
Update March 2024 – the developer has removed AetherSX2 from the Google Play store as well as taken down the website. I now recommend using NetherSX2 as a fork of the original AetherSX2 which is still available.
Download the builder.zip file from the assets section of the latest release and extract that file to a temporary location.
Run the file called build-nethersx2.bat
This will download the original AetherSX2 app as well as patch the file with the NetherSX2 updates. When completed, we can find the NetherSX2 apk in the folder labeled PatchedAPK
Getting Started With RP2S PS2 Emulation
Source your ROMS
In addition to the app, you will also need to source your own PS2 roms. Generally, PS2 roms will have an ISO, Bin/Cue/ or CHD extension format. Any of these file formats will be compatible with AetherSX2.
While sourcing PS2 roms, I recommend grabbing PAL (European) versions of the game as they run at a native 50Hz meaning that they run at 50FPS. As the RP2S is just barely capable of running PS2 games, emulating a game a 50FPS is easier than 60FPS so you might as well give yourself the best chance possible to get it running at full speed.
Source a BIOS file
You’ll also need a copy of the PS2 BIOS. You’ll have to find this one for yourself as well but I suggest looking for SCPH-90001 in the internet archive.
BIOS files will generally have a BIN extension but the internet archive version will be in a zip file with a ROM0 extension
Organize your files
Once you have all of your ROMS and a copy of the PS2 Bios file, be sure to move them to an SD card or to the internal storage of the RP2S.
I would generally recommend that you put all of your PS2 roms into their own folder together and create a BIOS subfolder with the necessary BIOS files together.
Setting up NetherSX2
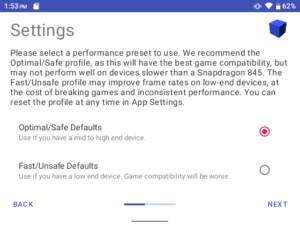
When you first start the NetherSX2 app, you will have to go through the setup wizard. The first two screens of the setup wizard are just a basic introduction to the app but the third screen is where you will start to make some decisions.
At the third step you will be asked to choose between Safe/Optimal Defaults or Fast/Unsafe Defaults. I have personally found that the Safe/Optimal Defaults are the most stable and are the best settings to choose as a baseline for getting started.
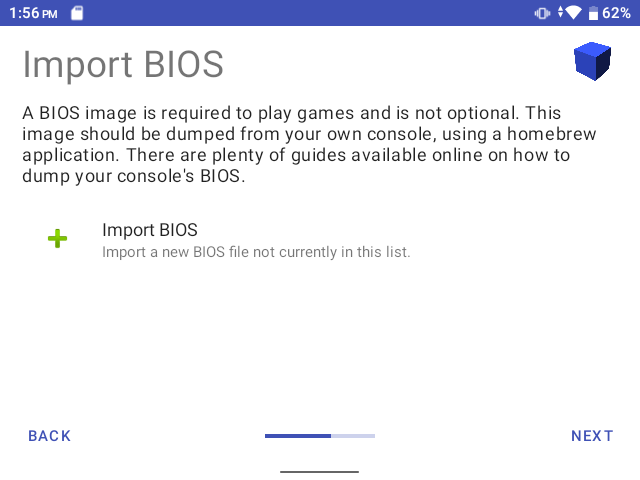
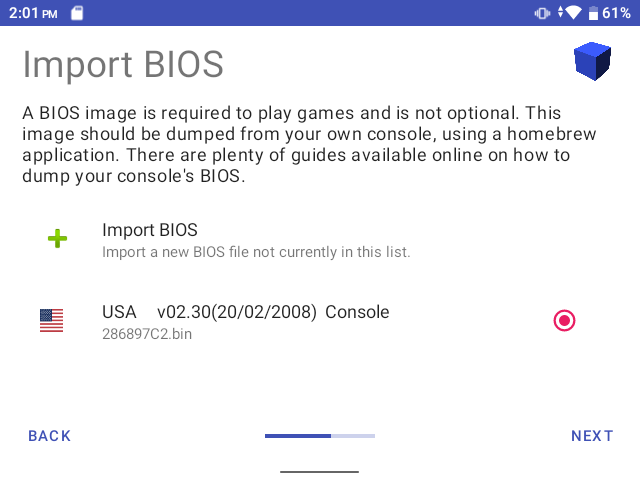
After selecting your default presets, you’ll be asked to select your BIOS file. Generally, the BIOS file will have a BIN extension but if you found the zip from the internet archive with a bunch of files in it, then the file you are looking for is the one with the ROM0 extension.
Browse to the folder with your BIOS file and select the appropriate file. Assuming that it is a valid file, you’ll see the BIOS show up as an option to be selected.
Next we need to pick our Game Directory where all of the PS2 roms are located. At the Game Directory page, press the + icon in the lower right and navigate to your ROM folder then select Use This Folder and Allow.
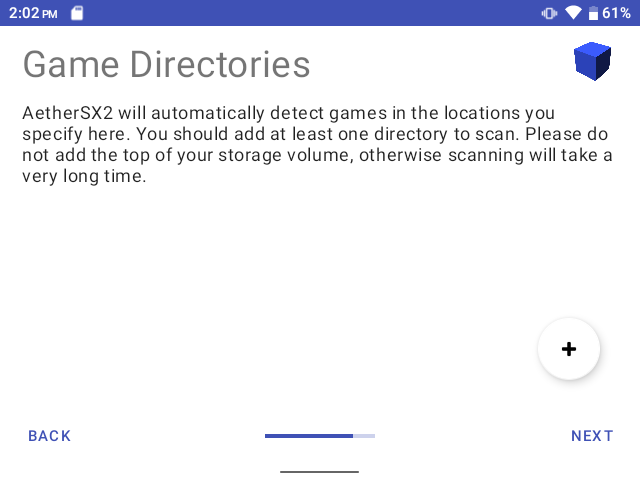
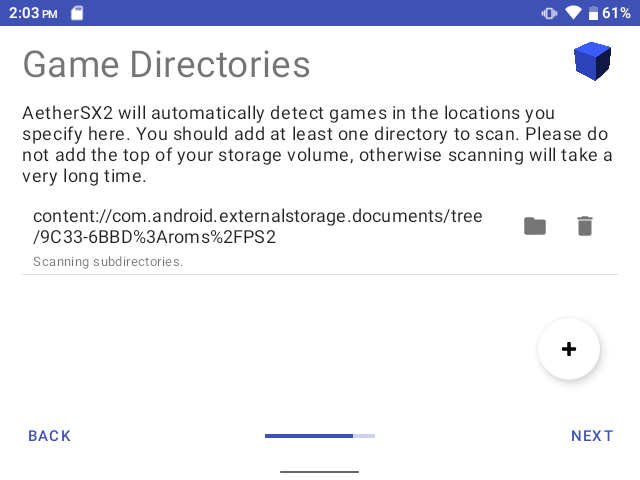
When you are done, the last step is to just hit the Finish button at which point the app will scan the folder for all of the compatible games that it found.
Optimizing the RP2S PS2 Settings
Now that we have the system setup, we can actually begin playing games from here but before we do that, there are a few settings that we need to tweak to get the best performance.
The first setting that we need to change is the Graphic Renderer. To access this, press the hamburger menu in the top left corner and scroll down to App Settings. Click on the Graphics tab and set the GPU Renderer to Vulkan
Next, scroll down on the Graphics menu until you find Threaded Presentation and set this value to ON
Tweaking your RP2S PS2 Settings
The above settings are a good starting point for getting your games to run. With luck, you should find plenty of PS2 gems out there that are completely playable with the basic settings I describe in this setup guide.
However, you will rather quickly encounter games that are slow or just don’t seem to be performing well. Not all hope is lost just yet, however, as there are still some settings that we can tweak to try to get some of these games to perform well enough to play.
Keep in mind that the RP2S is not capable of emulating every single PS2 game. In fact, there will be quite a lot of AAA games that are just not playable at all no matter how many settings you play with.
Additionally, using the tweaks I describe below will not be for everyone as they will introduce frame skipping and make the game a little less smooth or look a little worse in the name of increasing the emulation speed.
With that in mind, it is possible to tweak settings on a Per Game basis without messing up the settings for other games that are running well.
To change the settings on a per game basis, with the game running press the back button to bring up the emulator settings. In the top row you will see an icon that is the letter i in a dark circle. Press this to adjust the settings per game. (Note that the gear icon will change global settings for all games so don’t touch that one!)
The settings below are the ones that I recommend tweaking in order of impact to the emulation.
- Graphic Settings: Try setting Hardware Download Mode to Disable Readbacks or Disabled
- System Settings: Try setting the EE Cycle Skip to Mild Underclock (1) and progressively more underclock. This usually causes the game to attempt to render fewer frames causing it to be less smooth but hopefully run at full speed
- System Settings: Try setting the EE Cycle Rate to 75% (-1) or less. For some games, this has the effect of slowing down the entire game making it feel like slow motion.
- Graphic Settings: Try setting the GPU Render to OpenGL instead of Vulkan
Trying varying combinations of these settings as well as experimenting with other settings could render a few more games to be playable that didn’t work with the original settings.
More Reading..
-
RP2S vs RG405M
With the recent introduction of the Retroid Pocket 2S (RP2S) using a newer, but slightly less powerful Unisoc chip found in the RG405M and RP3+, there…
-
Retroid Pocket 2S Starter Guide
The Retroid Pocket 2S is a small retro handheld device that aims to capture the under $100 (USD) market. With the same design as the Retroid…