Retroid Pocket 2S Starter Guide
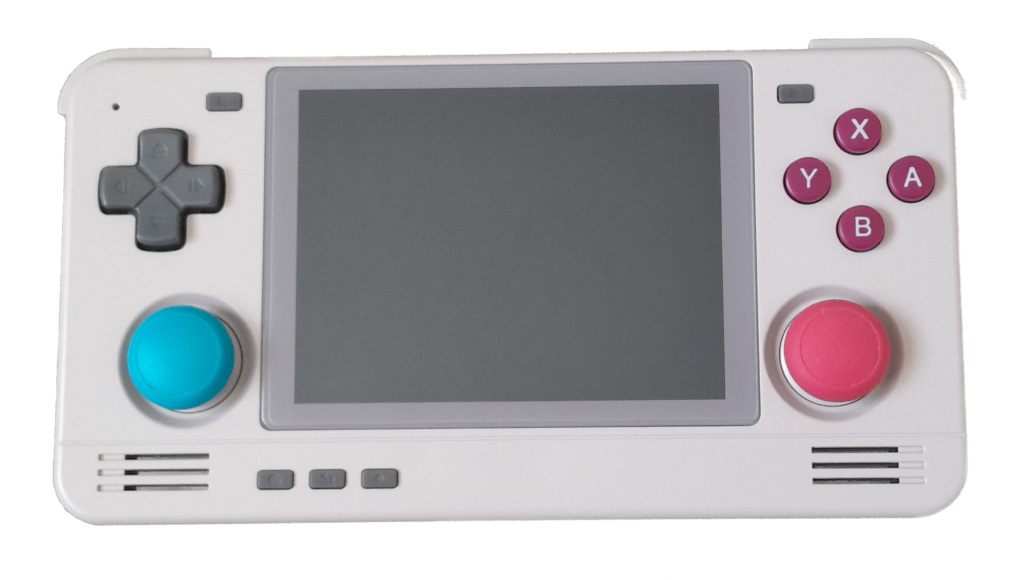
The Retroid Pocket 2S is a small retro handheld device that aims to capture the under $100 (USD) market. With the same design as the Retroid Pocket 2 released 2020 and 2+ released last year, this android based retro handheld device has updated internals that should give it more power than the 2+. In this Retroid Pocket 2S Starter Guide, I will walk you through setting up your device and getting you up and running.
Introduction
The Retroid Pocket 2 was first introduced in 2020 and was targeted at the budget sub $100 price point. With a horizontal form factor with a 4:3 aspect ratio screen, dual joysticks (though one was a slider), and stacked shoulder buttons, it sold well.
In the next couple of years, Retroid would go on to release an upgraded chipset in the same form factor dubbed the Retroid Pocket 2+ which was soon replaced with the Pocket 3 and eventually 3+ in a 16:9 aspect ratio. The Pocket 2S aims to return to the RP2 form factor and budget price range.
With a Unisoc 610 chip, the Retroid Pocket 2S brings improved PS2 and Gamecube as well as some Switch emulation to the sub $100 price range for the first time. However, as an Android based handheld, there is a bit of a learning curve in getting it setup.
In my Retroid Pocket 2S Starter Guide, I will show you how to setup and get started using the Retroid Pocket 2S. So, let’s get started!
Where to Buy the Retroid Pocket 2S
Retroid Pocket 2S vs RG353PS
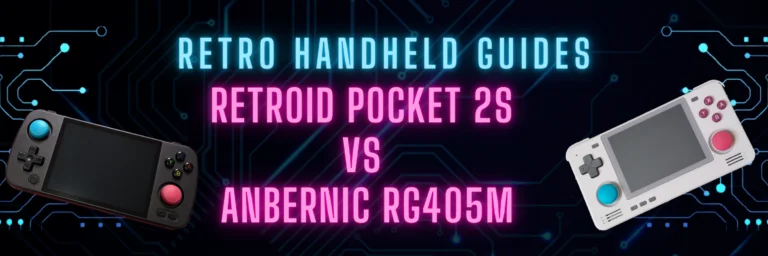
While there have been many comparisons to the Retroid Pocket 3/3+ and the RG405M as a benchmark as the RP2S has a newer (though less powerful) version of the Unisoc chipset, I think a good comparison for the Retroid Pocket 2S is probably the RG353PS as these two devices will be competing directly in the sub $100 price range.
For my in depth comparison of the RP2S vs RG405M, check out this link
RP2S vs RG353PS form factor
The RG353PS is a Linux based horizontal form factor retro handheld device with stacked shoulder buttons and based on the RK3566 chip. While there is a dual boot Android and Linux version of this device in the RG353P, it retails for $119 USD.
The Retroid Pocket 2S is an Android based horizontal form factor retro handheld device with stacked shoulder buttons and based on the Unisoc 610 chip.
Both handhelds have a 4:3 aspect ratio, 640×480 resolution 3.5″ screen. Both have built-in Wifi and Bluetooth and both have HDMI out capabilities.
In terms of aesthetics, the RG353PS is arguably more stylish with its SNES controller inspired design. The Retroid Pocket 2S looks a bit boxy and very rectangular in shape.
RP2S vs RG353PS software experience
Where the Retroid Pocket 2S differs greatly from the RG353PS is in the emulation performance and software experience.
The RG353PS is Linux based and has a large developer community following which means there are a number of mature Custom Firmware options available which come with pre-configured emulators and an easy to use interface.
The Retroid Pocket 2S is Android based which means different emulator apps for each system with their own configurations and setup processes. Here I will, however, give it to Retroid in that they do have a pretty good out-of-the-box experience with their custom built Android Launcher and pre-installed emulator apps trying to make it as easy as possible to get started.
RP2S vs RG353PS emulation performance
When it comes to emulation performance, all of the lower end 8-bit and 16-bit era systems will have no problems at all. That means NES, SNES, Sega Genesis, Gameboy Advance, etc will all have no problems at all on either handheld.
Where you will start to see some performance differences is as you approach consoles like Dreamcast, Sega Saturn or the N64 or handhelds like the PSP.
While the RG353PS can handle many of the games on the Dreamcast, Sega Saturn, N64 or PSP, you will likely still need to tweak settings or enable frame skipping on those systems to get some of the harder to emulate games to even run. As well, there will be games that are completely out of reach for these systems as well.
The RP2S on the other hand has no problem emulating Dreamcast, SS, N64 or PSP without any tweaking and can even emulate some Gamecube and PS2 games (though tweaking will be required in many cases).
Retroid Pocket 2S Initial Setup
The first time you turn on the RP2S you will be greeted with a pretty standard Android setup. During this setup you will go through the process of connecting your wifi, setting your timezone, and other basic settings.
You will also be asked if you want to install a number of pre-downloaded emulators for your games. Here I would recommend that you download your own emulators with the exception of the Dolphin for Handhelds emulator which you should add during the setup. I will have a list of recommended emulators and settings further into the guide.
You will also be asked if you want to use the standard android launcher (like a desktop) or use the Retroid Pocket Launcher.
The included Retroid Pocket Launcher is perfectly capable and easy to use. If you just want to use something out of the box without a lot of additional configuration or hassle, the Retroid Launcher is for you.
Personally, I prefer to use Daijisho as my launcher as it is free, highly configurable, and easy to use.
Whether you choose to use the included launcher, Daijisho, or another android frontend launcher, you’ll ultimately still need to configure each emulator independently for the most part.
If you’d like to learn more about how to install and set up Daijisho, be sure to check out my Daijisho setup guide here
How to add games to Retroid Pocket 2S
The Retroid Pocket 2S plays games via a process known as emulation. Each game system being emulated will have its own app and supported filetypes for the game (also commonly known as a ROM). You will need to source your own ROMS as I will not be linking to any here nor will I tell you where to find them. For more information on emulators and supported filetypes, see the Emulator Setup section below.
Adding games to the Retroid Pocket 2S is a relatively simple process. There are three primary methods to adding your own ROMS to the system and those are: via a browser in the android OS, plugging it directly to a PC via the USB-C port, or via the SD card.
If you purchased the 4/128GB model, you could probably get away with storing all of your ROMS on the internal storage but if you purchased the 3/32GB model, you’ll likely want to add an SD card for additional storage.
If you want to add additional storage via an SD card, I highly recommend a reputability brand like Sandisk or Samsung. If you plan to emulate PS1 games or above, I recommend a larger SD card as the ROMS for these systems can quickly fill up your available space. I’ve included a few links below to some of my recommendations
When you first insert a fresh SD card into your RP2S, you will be prompted to format the card for usage with Android. I recommend that you format the card as external storage for maximum portability so that it can easily be used with a PC for file transfers.
Regardless of which method you chose to download the games to your system, I would recommend that you create a file folder system to help you to organize your ROMS.
Unlike most Linux based systems which create a file folder system automatically, the RP2S does not have a pre-defined file folder system already in place. Therefore, I would highly recommend that you create a folder on either your internal memory or the external SD card called ROMS and populate this folder with subfolders for each of your emulated systems.
- /<sd card>
- /ROMS
- PS1
- PS2
- GameCube
- Dreamcast
- Etc
- /ROMS
Adding games via a browser
As an android based handheld with Wifi, you have the option to simply use the built in internet browser to find your favourite site and download the games directly to the handheld without any computer necessary.
Just be sure to move your files to your file system structure as recommended above so that each emulator can find the games associated with them easily.
Adding games via an SD card
Alternatively, you could remove the SD card from your device and pop it into a PC using an SD card reader like this one from Amazon. Be sure to move your games into the file folder structure based on the emulated system to keep them organized.
Adding games via USB cable
Like most cellphones, the RP2S can also be plugged directly into a PC via a USB C cable. Plug your USB-C cable into the RP2S and directly to your PC and you should be prompted on your RP2S with a notification in the shade (pull down from the top of the screen) to update your USB settings and switch it to File Transfer.
Once you’ve done this, you can open your File Explorer on your PC and via the contents of your RP2S internal storage and SD card. Here you can transfer files just as if you are transferring between different file folders on your local computer.
Retroid Pocket 2S Emulator Setup
Dreamcast
For Dreamcast Emulation on the Retroid Pocket 2S, I recommend Redream
The Retroid Pocket 2S can easily handle Dreamcast emulation. With the Redream emulator, there isn’t much setup needed aside from pointing to your ROMS folder.
The Redream emulator has a paid version which allows you to upscale your games but with the small screen on the RP2S, this isn’t really going to be of much benefit.
Redream download link: https://play.google.com/store/search?q=redream&c=apps
Playstation Portable (PSP)
For PSP Emulation on the Retroid Pocket 2S, I recommend PPSSPP
The Retroid Pocket 2S can handle PSP games without any problems at 1x resolution. There are no hacks or additional settings required to run any PSP game that you might want on this device.
The only initial setup that you will need to do is point to your ROMS folder and setup your controller mapping.
Recommended PPSSPP Settings for the Retroid Pocket 2S
- Backend: Vulkan
- Rendering Resolution: Auto (1:1)
- Frame Skipping: Off (turn to 1 for very intense games)
- Auto Frameskip: Off (turn On if you are using frame skipping = 1)
- Skip GPU Readbacks: On
- Vertex Cache: On
- Lazy Texture caching: On
- Spline/Bezier curves quality: Low
- Hardware transform: On
- Software Skinning: On
- Hardware tessellation: On
- Upscale level: Off
- Anisotropic filtering: Off
As the RP2S has a 4:3 aspect ratio versus the original PSP aspect ratio of 16:9, the RP2S will have black bars on the top and the bottom which makes for an even smaller viewing area on an already pretty small screen. One tip for maximizing the screen real estate is to open the PPSSPP menu and go to Display Layout & Effects menu and set the aspect ratio to 0.85. This feature uses a trick to shift the screen elements to fill up more space without stretching the image too much. I find the 0.85 aspect ratio a good compromise.
PPSSPP Download Link: https://www.ppsspp.org/download
Nintendo 64
For Nintendo 64 emulation on the Retroid Pocket 2S, I recommend M64Plus FZ
The RP2S has is easily capable of handling N64 emulation. There are no special tweaks or settings necessary to get any game to run at full speed.
Retroarch has a number of emulator cores that can handle N64 emulation with varying degrees of customization options and if you are familar with Retroach than it is certainly a good option.
I prefer to use the standalone M64Plus FZ app, however, for its easy of use and simple interface as well as the ability to easily setup save states and auto-resume.
There is both a free version and a paid version of this app which removes the ads. Well worth the $5USD to pay to remove the ads in my opinion.
M64Plus FZ download link: https://play.google.com/store/apps/details?id=org.mupen64plusae.v3.fzurita
Nintendo DS
For Nintendo DS emulation on the Retroid Pocket 2S, I recommend Drastic
The RP2S has no problems running any Nintendo DS game that you want to throw at it. The NDS, of course, had two screens where the RP2S only has one so there will be some concessions that have to be made to play these games.
With a small 3.5″ screen, I find that it is best to try to stick to games that only require one screen at a time to play. It is possible to setup your screen layout with side-by-side or stacked screens but you lose a lot of screen real estate in either of these setups.
As the RP2S has a touch screen, it is possible to simulate the touch screen pen of the Nintendo DS which is a huge benefit.
While there is an excellent free emulator available that plays Nintendo DS games called MelonDS, I personally prefer the paid app Drastic as it allows you to map hotkeys to toggle screen layout and screen switching which isn’t currently available in MelonDS.
Drastic download link: https://play.google.com/store/search?q=drastic&c=apps
MelonDS (free) download link: https://play.google.com/store/search?q=melonds&c=apps
Gamecube
For Gamecube emulation on the Retroid Pocket 2S, I recommend using the Dolphin for Handhelds MMJR2 build included in the stock software.
The Retroid Pocket 2S is capable of running a good number of Gamecube games but you will likely need to tinker with settings on a per game basis to really get the most out of this system. If you don’t really like messing around with a bunch of different settings then I would recommend that you just avoid Gamecube emulation.
While the RP2S is capable of some Gamecube emulation, I would not call this device a GC capable device out of the box. Many games will require tweaking or not run at full speed consistently, and some will just not be a good experience at all.
If you plan to emulate some Gamecube games, there are two emulators that I would recommend and you’ll have to test each to figure out which is best for each game as it will vary from game to game.
The two emulators I recommend installing are Dolphin for Handhelds (MMJR2) and the Official Dolphin latest development build.
The Dolphin for Handhelds build is included in the initial setup. If you skipped it, you can always restart the setup without losing any of your settings by opening the Android Settings screen, go to the Handheld Settings Menu -> Advanced then selecting Re-enter Setup Wizard.
My recommended settings for Dolphin for the RP2S
- Use PAL versions of games wherever possible
- Video Backend: Vulkan
- Shader Compilation Mode: Hybrid Ubershaders
- Compile Shaders Before Starting: On
- VBI Skip: On (only available in official dolphin)
- Skip presenting duplicate frames: On
Official Dolphin Development version download link: https://dolphin-emu.org/download/
Playstation 2
For Playstation 2 emulation on the Retroid Pocket 2S, I recommend NetherSX2 (a fork of AetherSX2)
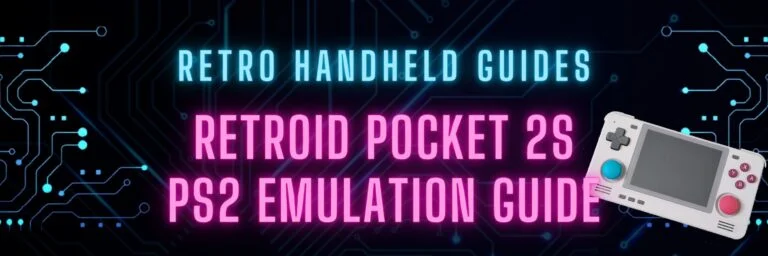
For a complete guide on setting up RP2S PS2 Emulation, check out my RP2S PS2 Emulation Guide
The Retroid Pocket 2S is capable of emulating some PS2 games but not the entire library. This device is not a PS2 capable device, but if you are willing to tinker with settings, you can certainly find a good number of games that will play just fine.
When settings up the NetherSX2 emulator for the first time, you will need a copy of the BIOS file. There are a number of different versions of this but I recommend looking for SCPH-90001 in the internet archive.
I also recommend that you start with the Safe/Optimal settings preset and set the backend to Vulkan rendering.
When you run into a game that seems to be running just a little bit slow, then you can try setting the EE Cycle Rate or EE Cycle Skip to a lower value in the System Settings menu though your results will vary by game.
Another tip is to set the Hardware download mode to Disable Readbacks or even just Disable altogether as this can usually have a positive effect on the performance.
NetherSX2 Github download link: https://github.com/Trixarian/NetherSX2-patch/releases
Nintendo 3DS
For 3DS emulation on the Retroid Pocket 2S, I recommend Lime3DS (a fork of Citra)
When the Retroid Pocket 2S was first released, I would have recommended to just stay away from 3DS emulation as this chip was just too weak to handle it but as of Citra Nightly build 1989, the official Citra team has incorporated their Vulkan driver support and I can now say that some 3DS is entirely playable on this device!
While Citra is no longer being developed, those vulkan developments have since been ported over to a fork of Citra called Lime3DS
With the Vulkan backend work finally added to one of the more “stable” releases, there are a number of lighter 3DS games that can be played on this device including MK7 and Super Mario 3D Land.
While some of the lighter games will play without much issue (or only minor graphical issues), heavier games will still struggle on this device. Overall, I would say that a limited number of 3DS games can be played on the RP2S.
Recommended settings for the Lime3DS on the RP2S
- Graphics API: Vulkan
- SPIR-V shader generation: Off
- Asynchronous shader compilation: On
- Internal Resolution: 1x
- Disk Shader Chache: On
Official Lime3DS GitHub download link: https://github.com/Lime3DS/Lime3DS/releases/
Nintendo Switch
The Nintendo vs YUZU settlement has shaken the Switch Emulation world and as a result, both YUZU and Skyline have been removed from the internet. At this point, there is no viable Switch emulation app available for Android.
For Nintendo Switch emulation on the Retroid Pocket 2S, I recommend the last Skyline Edge build 69
The RP2S is can handle some very limited, lightweight Nintendo Switch games. This device is by no means powerful enough to emulate very much of the Switch library and the fact that it can handle any games at all is just incredible.
If you keep your expectations very low, you will see that you can emulate some of the lower end indie 2D pixel art games. Even then, your results will vary from game to game and many will likely fail to boot or crash unexpectedely.
If you do plan to try Switch emulation, I have found that the last Skyline Edge build 69 is your best bet. Skyline is no longer in development so do not expect any updates here to improve performance. Yuzu is another android Switch emulator but I haven’t had any luck booting games with it on the RP2S so for now you’ll have to stick with Skyline.
To use Skyline, you will need to find a copy of two files called Prod.key and Title.key which can be found on the internet. When you open Skyline and go into the settings, there is an area to locate these files for the emulator.
If you need more help setting up Skyline, check out my AYN Odin Skyline (Switch) Emulator Setup Guide which has a lot of information on some of the setup. For the RP2S, I suggest just keeping the basic settings as most of the rest of the info in that guide will not be applicable for this device.
Retroid Pocket 2S Game Streaming
The Retroid Pocket 2S is capable of game streaming through services like Xbox Gamepass, GeForce Now, or Steam Link and Moonlight.
Performance through streaming in my tests was good with the wifi being good enough to hold a stable connection with few hiccups.
Like some of the higher end emulated systems, the standard 16:9 aspect ratio of many of the streaming services does not translate directly to the 4:3 aspect ratio of the Retroid Pocket 2S so you will have black bars on the top and bottom.
As long as you plan to play games that don’t require you to read too much text, this device is not bad for game streaming as a budget option.
Retroid Pocket 2S Accessories
- Official Retroid Grip Case – If you are looking to make the RP2S a little more comfortable to hold, Retroid has created an official grip case which clips onto the back of the device to make it feel more like a controller in hand.
- The RP2S can also serve as a mini portable console that connects to a TV via a micro HDMI port on the top. Pick up one of these Micro HDMI to HDMI cables from Amazon to start playing on your TV!
- To add even more of a console feel, why not connect a bluetooth controller to your device and turn the RP2S into a full fledged mini console that you can take anywhere. 8Bitdo has an awesome line of bluetooth controllers that work well from the ultra portable 8Bitdo Micro which fits in the palm of your hand to a more full sized controller like the 8Bitdo Ultimate
- For a more retro classic feel, you can even try to the 8Bitdo SN30 with its SNES inspired design
- If you want to add more storage capacity for a larger ROM library, I recommend a Sandisk microSD card of at least 64GB if not larger
- To quickly add games to your SD card via a PC, you’ll also need an SD Card USB adapter like this one from Anker available at Amazon
More Reading..
-
RP2S PS2 Emulation Guide
The Retroid Pocket 2S is a surprisingly capable mid-range emulation handheld. Based on a slightly less powerful version of the chip used in the RP3+ and…
-
RP2S vs RG405M
With the recent introduction of the Retroid Pocket 2S (RP2S) using a newer, but slightly less powerful Unisoc chip found in the RG405M and RP3+, there…