AYN Odin Joystick Replacement Guide
This AYN Odin joystick replacement guide will walk you through the tear down of the AYN Odin and replacement of the joysticks with any joycon compatible replacement including hall sensor joysticks from Gulikit or the Retroid Pocket 3+.
Wondering what the best Hall Effect Joysticks are for the AYN Odin? Check out my thoughts here on the AYN Odin Best Hall Effect Joystick
While the process may seem intimidating if you haven’t had much experience with opening electronics and taking a look inside, I can assure you that it is not as complicated as it might seem. With the right tools and a little bit of finesse, you can have your AYN Odin joystick replacement done in under 25 minutes.
Tools you’ll need
I recommend that you pick up a good tool kit that includes the screwdriver, tweezers and separator like this one from Amazon
- Small Philips head Screwdriver
- Guitar Pick
- Tweezers
- Joycon replacement joysticks (Gulikit Hall Sensor, or Standard Joycon Joystick)
- Small bowl for the screws

Opening your AYN Odin
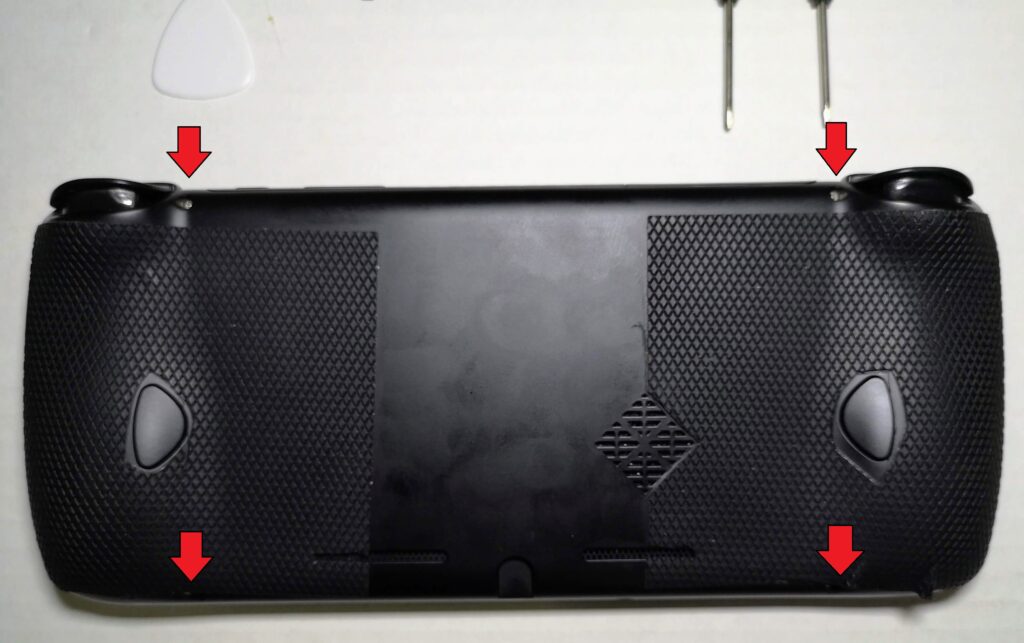
To open the AYN Odin, flip the unit over so that the screen is facing down on the table.
The back plate is held in place by four small screws. Each screw needs to be removed carefully by turning the screw counter-clockwise with your screwdriver.
Put the screws aside. I recommend that you use a small dish to hold all of your screws so that they don’t roll off the surface that you are using.
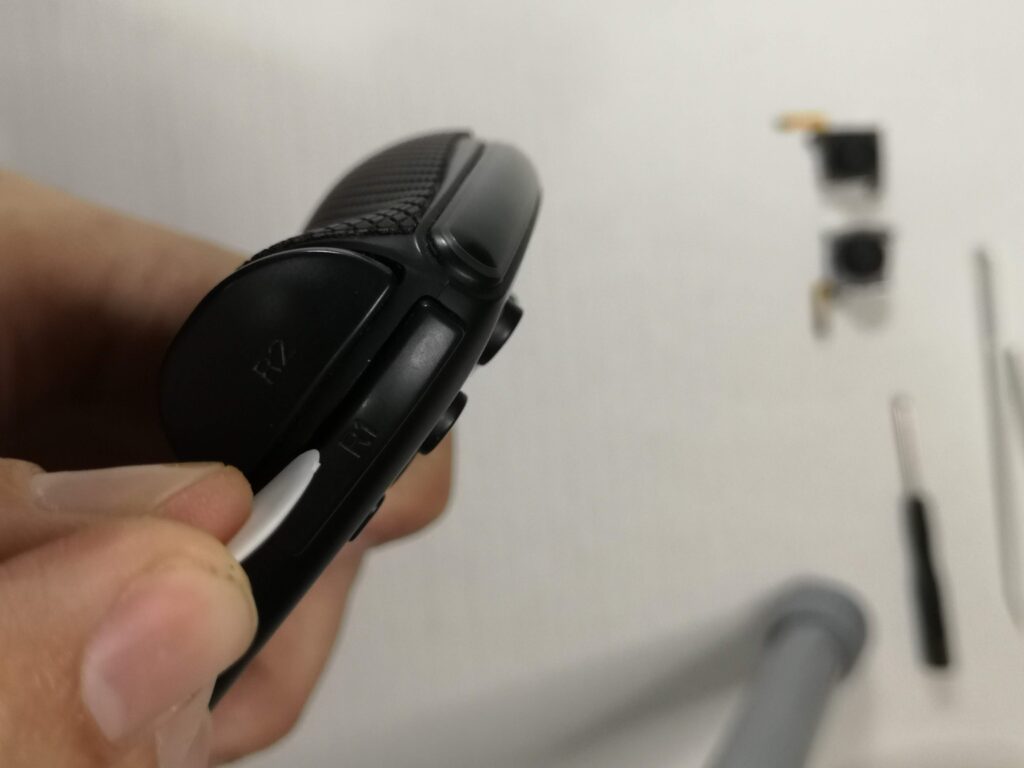
Next you need to remove the back plate carefully by prying it open with your guitar pick. To do this, insert your guitar pick in the gap between the R1 button and the case. Carefully twist the guitar pick until you hear a small pop as the back plate releases from the front of the case. Use this opening to work your way along the opening around the case releasing each of the hold points.
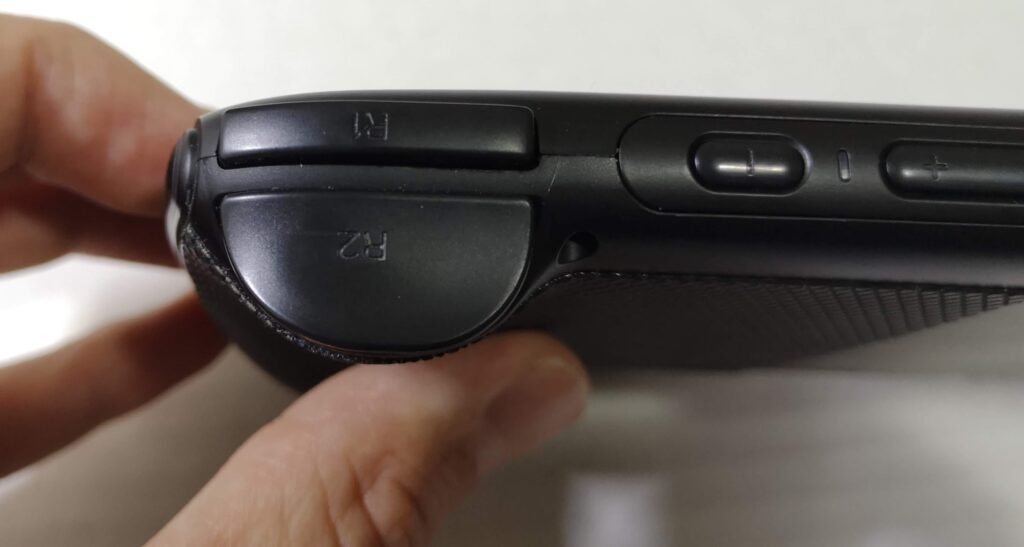
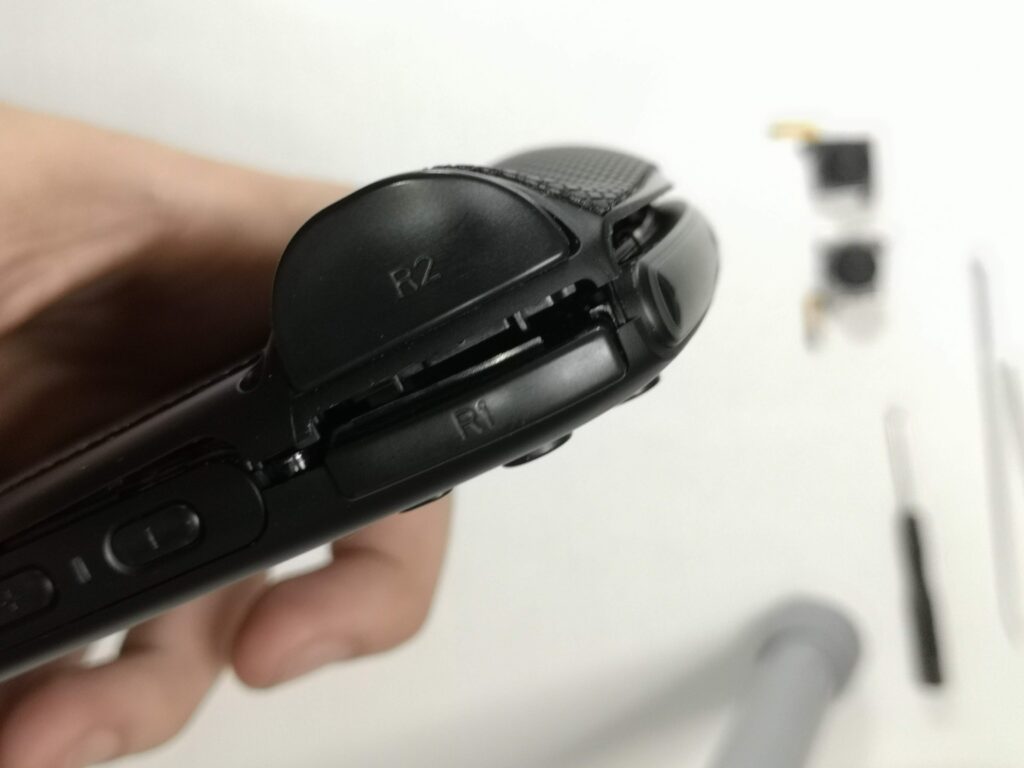
Remove the back plate carefully and set it aside being careful not to let the R1 and L1 buttons fall out as they are not secured to the case. You can place your AYN Odin back on the table face down.
Removing the old joysticks
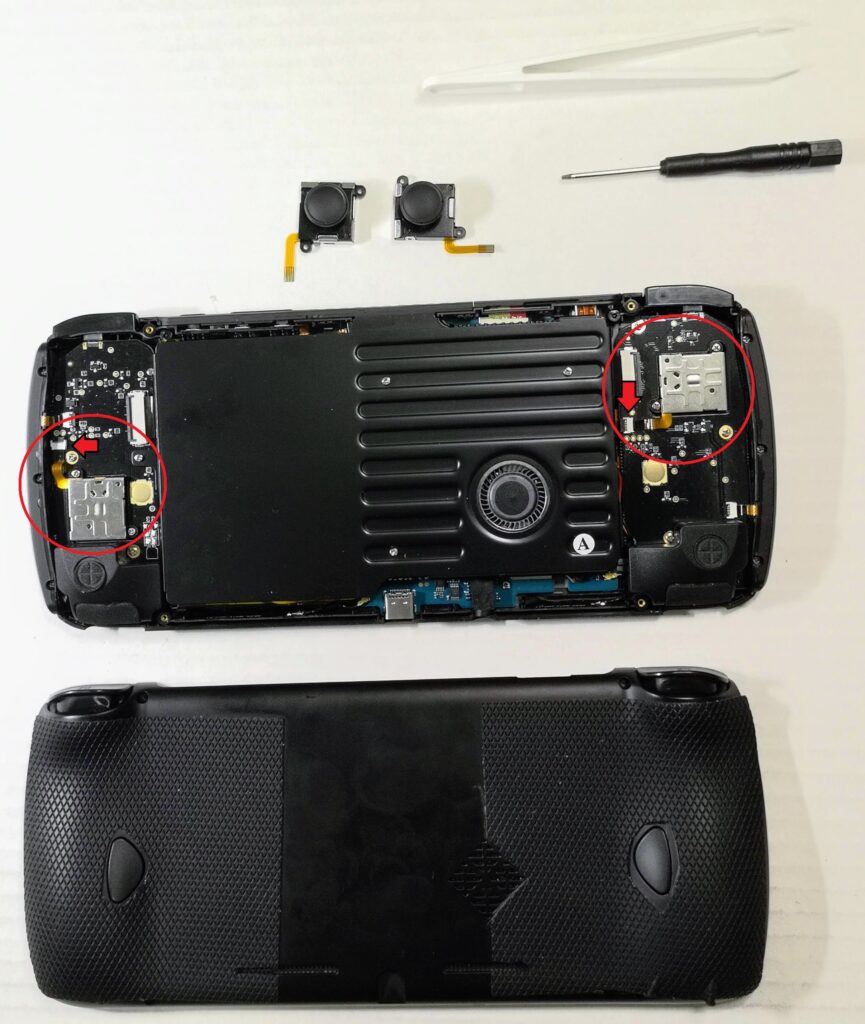
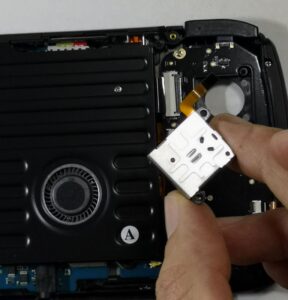
Next you need to locate the two joysticks inside your device. The joysticks are small square boxes connected to the main board by a very small ribbon cable. Each joystick is fastened to the main board by two small screws.
Before you unscrew the joysticks, you need to release the ribbon cable from the main board.
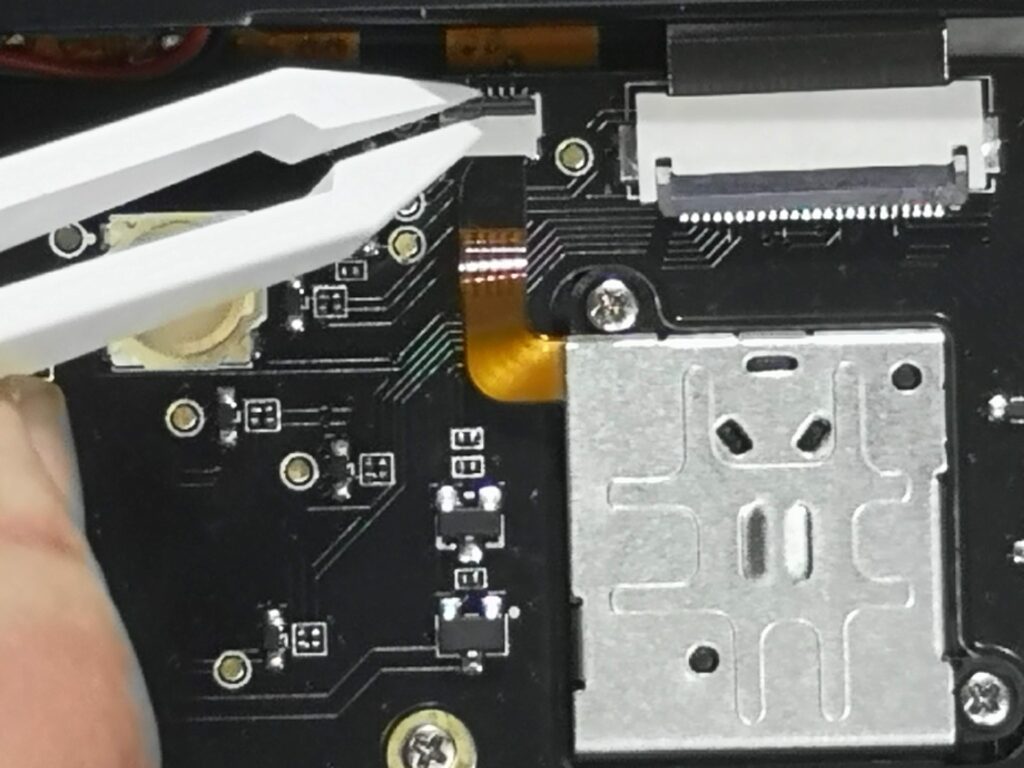
Each ribbon is connected to the board via a small white interface. The interface has a very small black latch on it which simply lifts like a very small switch. Use your tweezers to lift the latch carefully.
Once the latch is lifted, you can use the tweezers to carefully pull the ribbon from the interface. This should be very easy to do as long as the latch locking mechanism has been released. Do not force this.

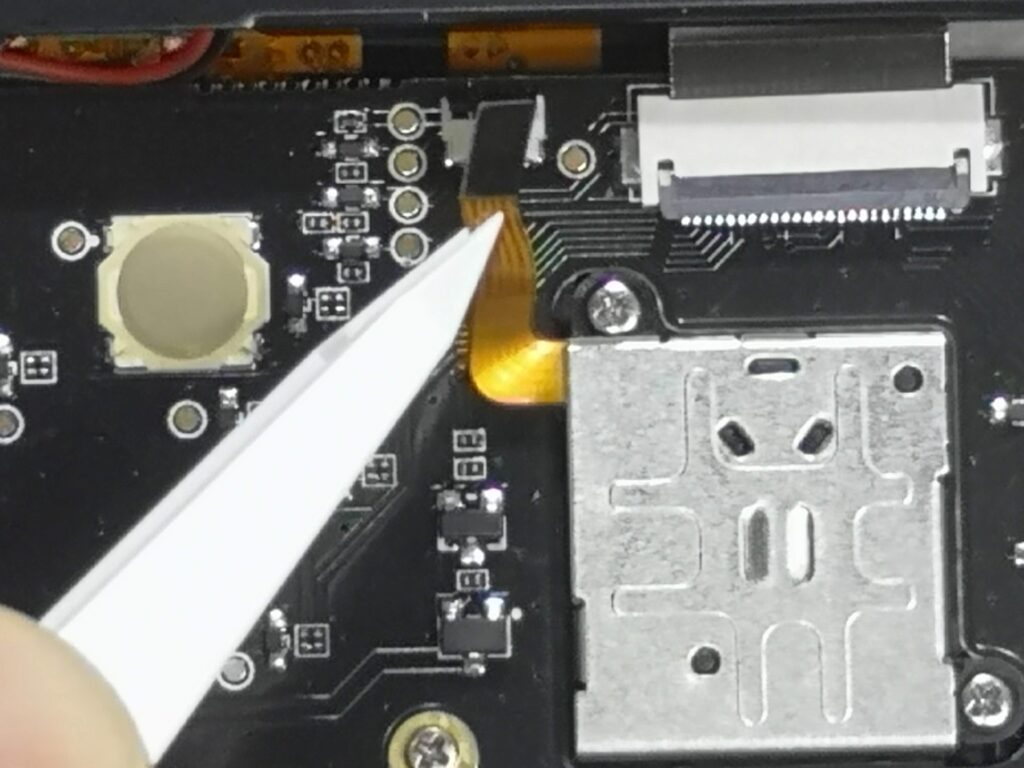
Now that the ribbon has been released, you can unscrew the joystick from the main board and carefully pull the joystick out of the case. The stock joysticks can easily be pushed through the opening. Be sure to put the screws aside but separate from the case screws as they are different sizes!

Repeat this same process for the second joystick then put both of your original joysticks to the side. Next we are going to put the new joysticks into the case and reattach them.
Inserting the new joysticks
This process is pretty much just the reverse of what we just did. First, put the joystick back through the case. Make sure that you line up the ribbon cable on the correct side and ensure the screw holes line up on the case. You can use the image above in the “removing” section for reference if you don’t remember the orientation of the joystick.
Depending on your new joystick, the size of the cap may be too large to comfortably fit through the hole in the case. For the gulikit joysticks, the entire cap can be removed right from the joystick stem; just be sure you don’t lose the little rubber dust skirt that sits on the stem. For generic joycon replacement joysticks, you can squeeze the joystick through the opening carefully or you can remove the rubber cap by carefully peeling the rubber off then replacing it with PS vita caps after your joystick has been installed.
Once the joystick is seated, carefully screw the joystick back down to the board. Do not over tighten the screws as you are likely to crack or damage the board if you screw it down too tight. Just enough until you feel it start to provide resistance as you turn the screw.
Now that the joystick is seated, you can replace the ribbon cable. To do this, use your tweezers to carefully fold the ribbon and push the head of the ribbon into the white interface. Most cables will not go in very far as the interface is pretty shallow. Once the ribbon is in, push the latch back down on the interface to lock ribbon in place. You can very gently tug on the cable to make sure that it is secure.
The same process repeats for the second joystick.
Putting the AYN Odin back together
Do a quick double check that all of the pieces are in place:
- R1 and L1 buttons are in place. If they have fallen out, they can be placed back in the case. The long thin arm sits on a post in the case and the button itself sits on top of a small button on the main board
- Ensure your joystick ribbon cables are secured
- Check that your joysticks are screwed back down to the board
Place the back plate back over the case and begin to press down on it around the edges. You should feel the case begin to snap back in place at the latches.
When the case is snug, you can put the screws back to secure the case.
Now that the case is back together, power on the unit and go into the joystick tester to check and calibrate your new joysticks.
Modifying the new Joystick caps
Here is a pro-tip: For the Retroid Hall Effect sticks and the standard Joycon replacement sticks, you can remove the rubber cap by gently peeling the rubber from the stem and replace them with PS Vita caps to add more height or texture without having the cap rub against the case. I use these PS Vita thumbstick caps I picked up from Amazon.
If you liked this guide about the AYN Odin joystick replacement, be sure to check out other guides on the AYN Odin here
More Reading..
-
AYN Odin Best Hall Effect Joystick
With the recent release of hall effect joystick replacement parts for the Switch, it’s a great time to upgrade your joysticks to eliminate drift forever….
-
AYN Odin Skyline (Switch) compatibility list
Here is a list of Switch games that I have personally tested on my AYN Odin Pro using the Skyline Emulator. Be sure to check…
-
AYN Odin Skyline (Switch) Emulator Setup Guide
In this guide for AYN Odin Skyline emulation, I’ll be showing you how to setup and configure your AYN Odin Pro to play Switch games….